


In Retrofitting Insulation (pages 36–38 of Build 146), Figure 2 illustrated retrofitting insulation into an existing wall where the internal linings are removed and there was no building paper. Changes are now needed for that figure in line with NZS 4246:2016 Energy efficiency – Installing bulk thermal insulation in residential buildings.
Provide a 20 mm gap
As good practice, BRANZ recommends a 20 mm gap between the back of the cladding and the insulation is beneficial. It allows some drainage and drying in the gap created.
Two revised details
Figures 1 and 2 are revised details that should be used when retrofitting insulation to walls from the inside. Always check the wall cavity has no leaks or water damage before retrofitting. The key difference is the provision of a 20 mm gap behind the insulation.
Figure 1 has wall underlay folded in and stapled taut before installing the insulation to keep the insulation clear of the cladding.
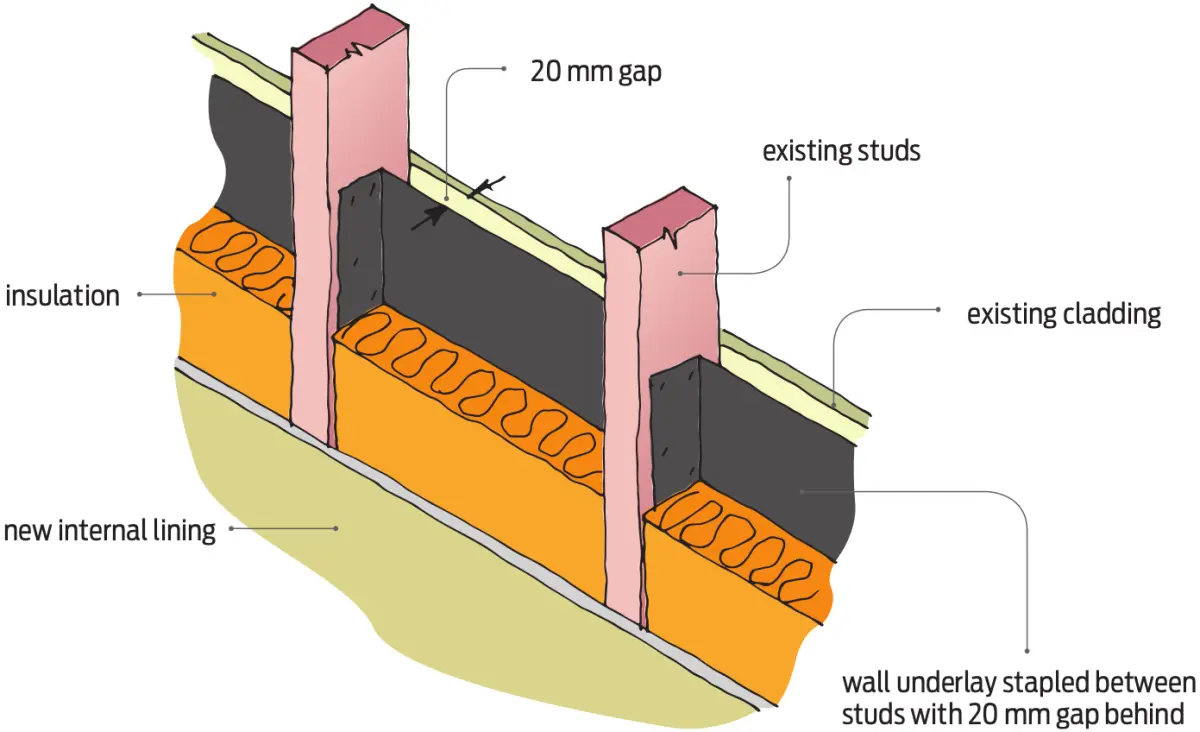
Figure 2 is based on a rigid insulation prevented from contact with the back of the cladding with nails or screws or by short 20 ×100 mm timber packers fixed up each side of the studs.

Get a building consent
Remember that retrofitting insulation to external walls requires a building consent.
Further information is given in BRANZ Good Repair Guide: Retrofitting Insulation.