

Timber window frames and sashes were the sole option for New Zealand buildings until the 1970s when aluminium became the dominant material for window frames and sashes.
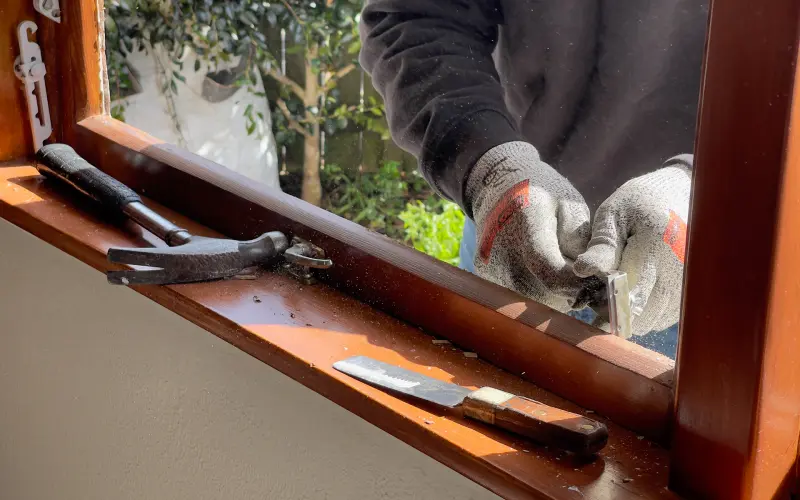
Demand continues for timber windows, particularly in renovation projects or where the natural appearance and thermal properties of timber are desired.
Get the installation right
Allied with this is the demand for reference details that show the correct installation for timber windows, particularly into cavity cladding systems.
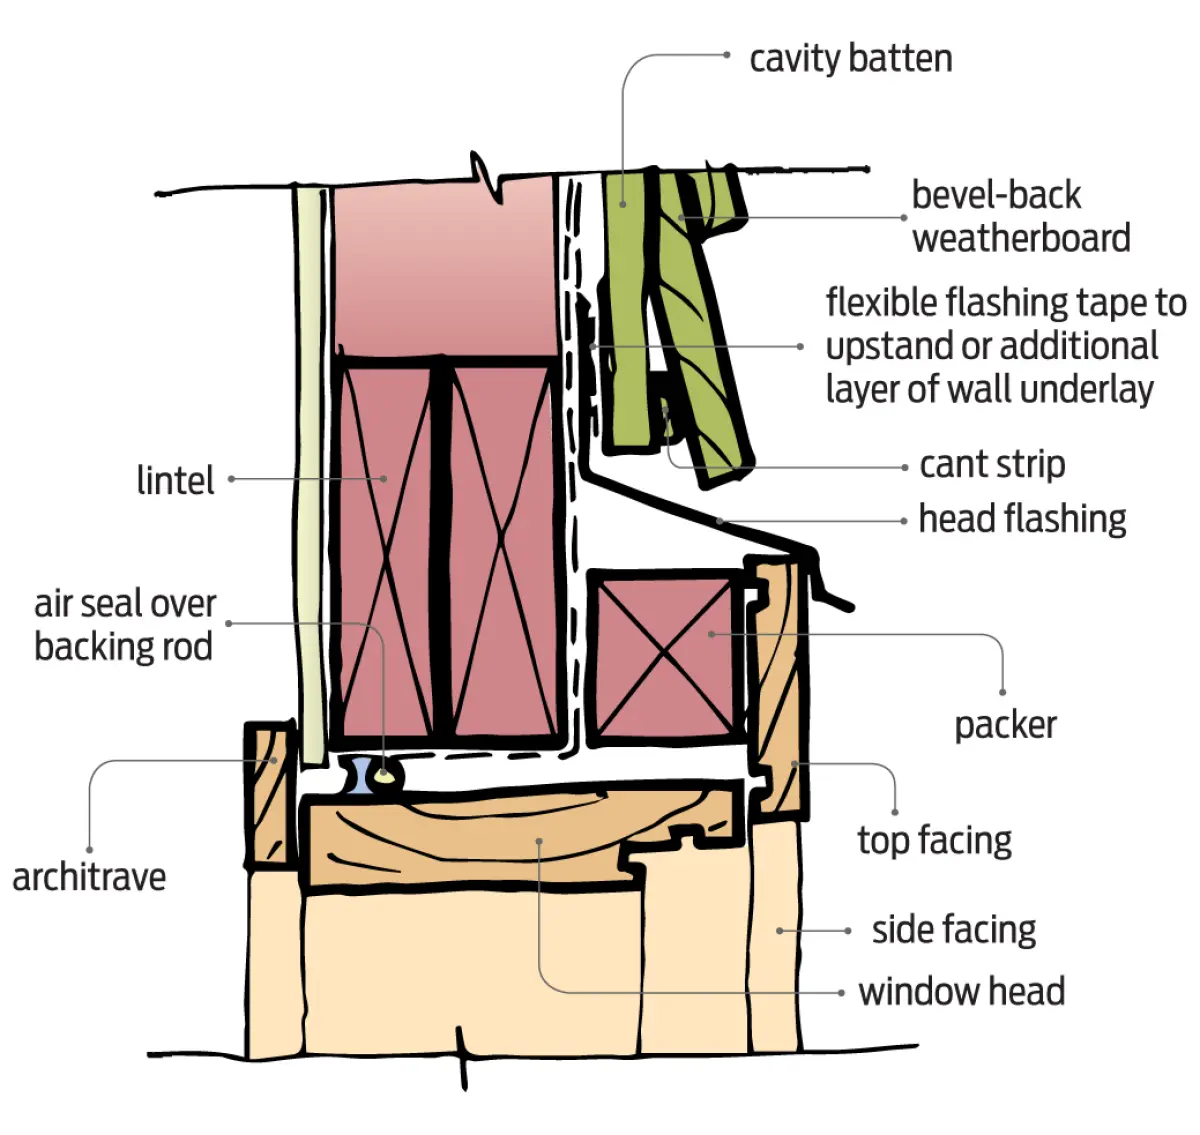
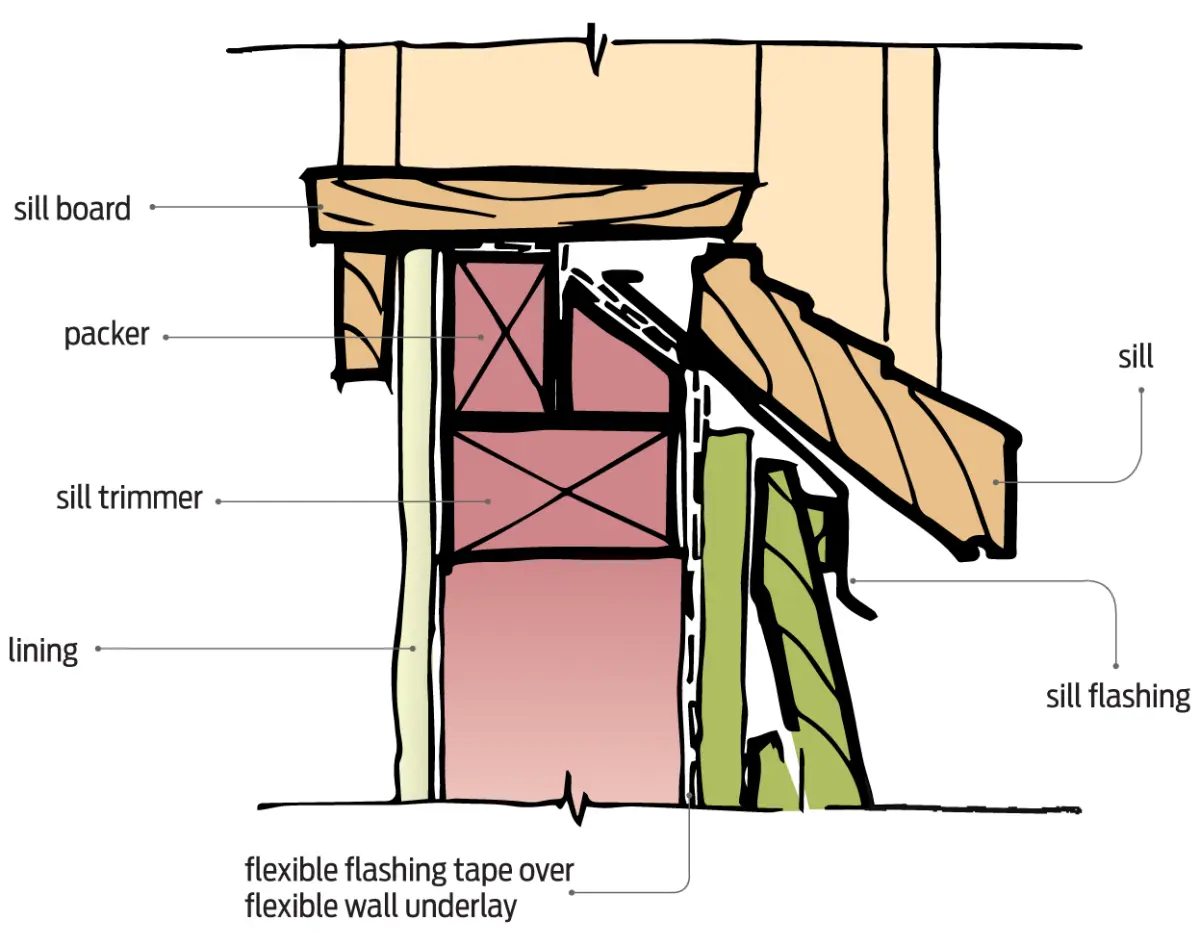
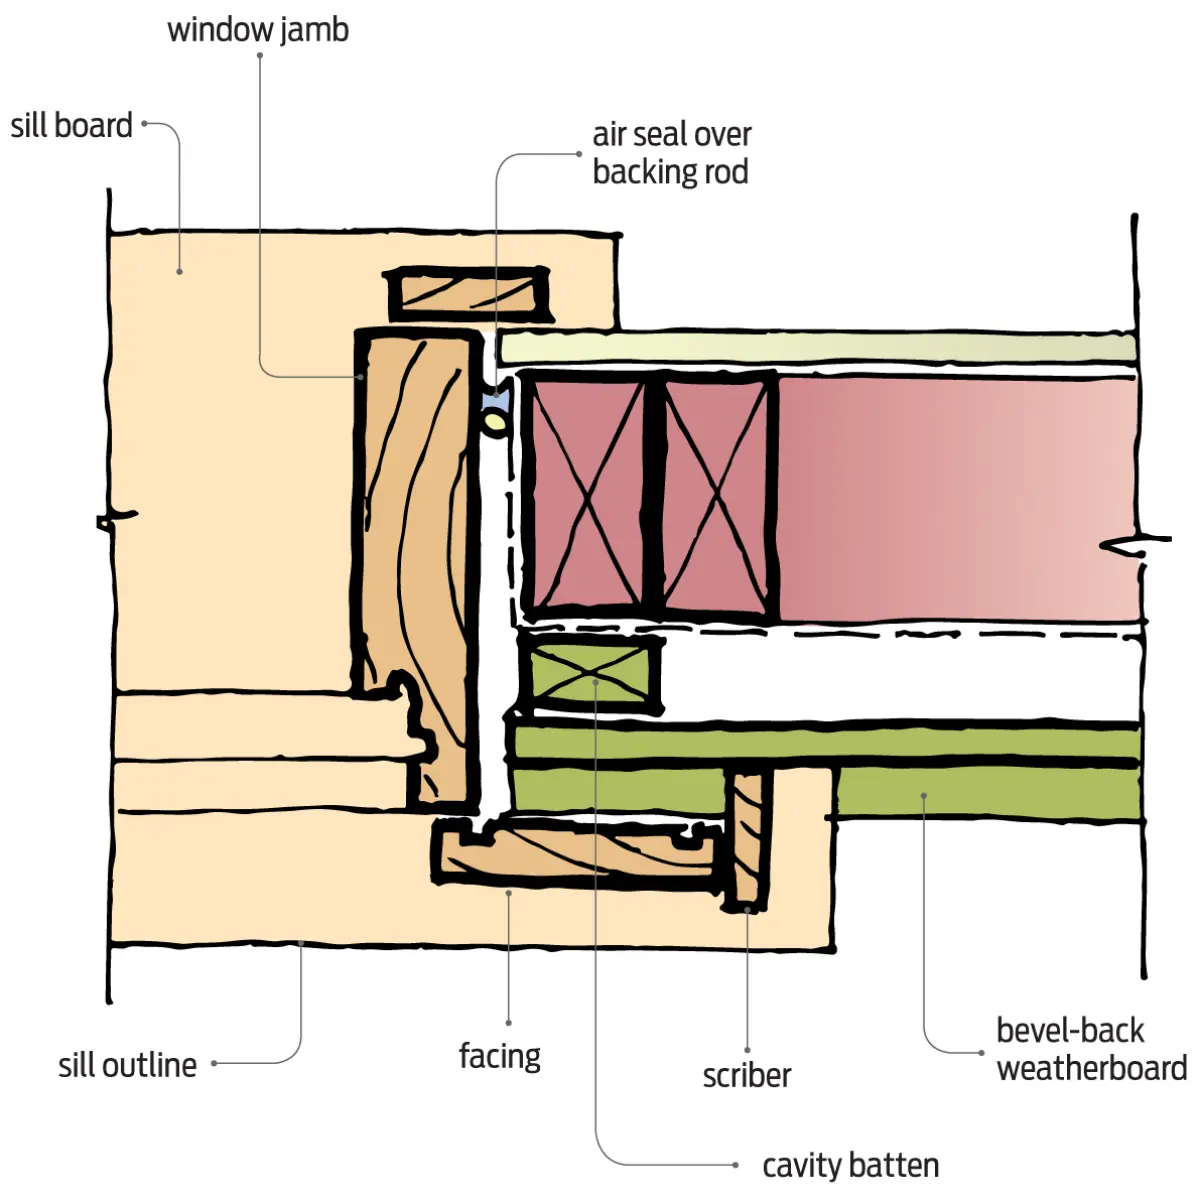
Figures 1 and 2 give two options for the window head detail, while Figure 3 covers the sill and Figure 4 the jamb.
The details incorporate features to improve performance such as:
• folding the flexible wall underlay into the framed opening
• installation of flexible flashing tape as shown in E2/AS1 for aluminium windows
• taping the head flashing upstand to the wall underlay or installing an additional layer of flexible wall underlay
• installation of air seals over backing rods.