


Bevel-back timber weatherboards have been used on New Zealand buildings for over 150 years. The first boards were simply square inch-thick planks that were installed horizontally with the upper board lapped over the lower.
In the intervening years, the boards acquired the profile we see today, but in essence, they are little changed.
Return of bevel-back weatherboards
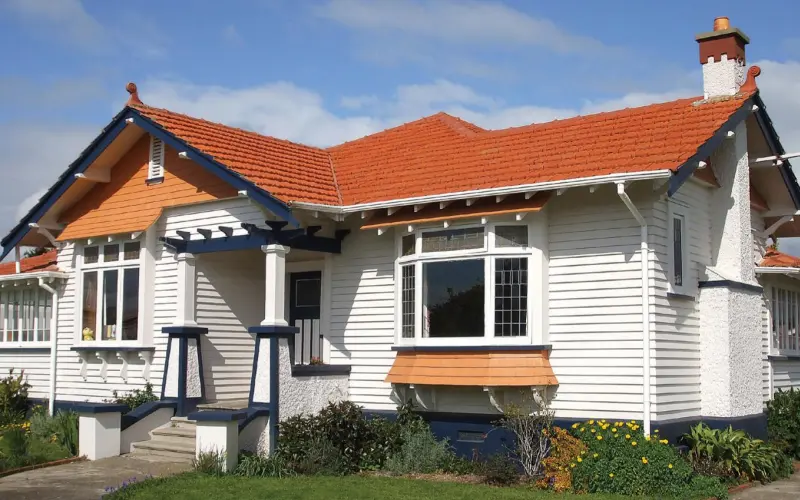
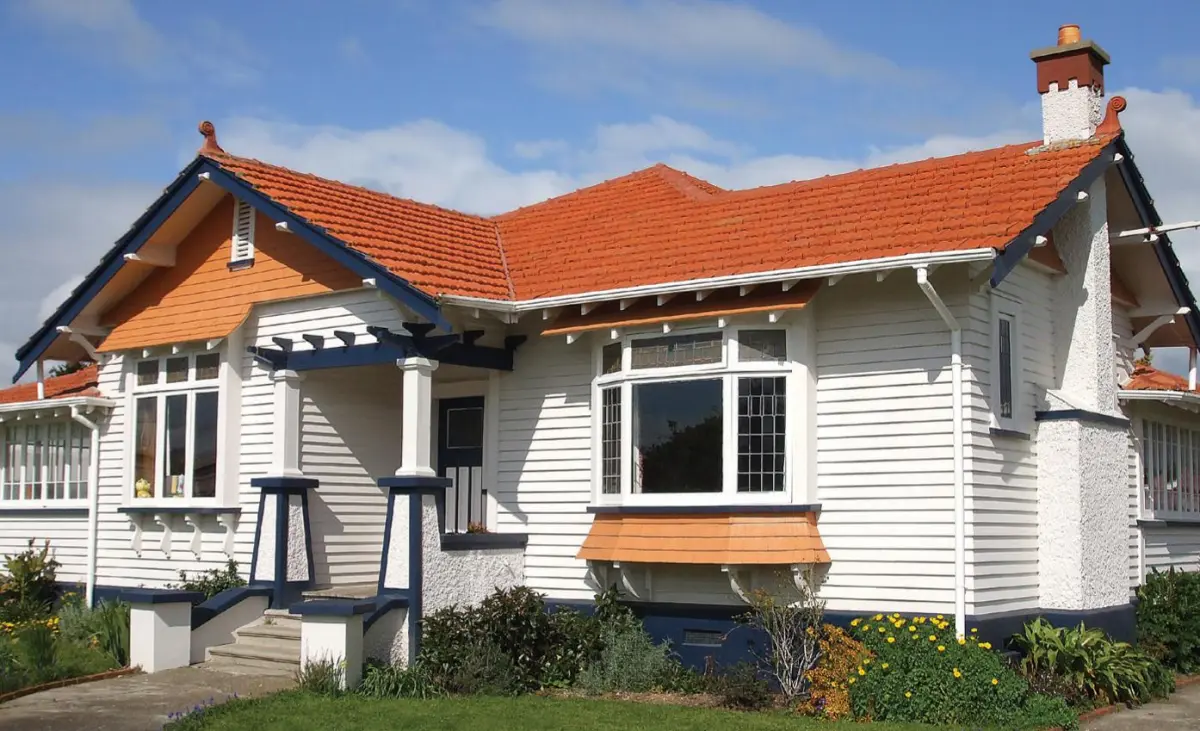
As is common with many claddings, there have been periods when the bevel-back timber weatherboard was popular, like the 1920s (see Figure 1) and 1940–50s, before fading from popularity.
Since the leaky building crisis, there has been a marked resurgence in the popularity of bevel-back timber weatherboards, particularly when installed over a drained and vented cavity.
Inexperience causing poor installation
This resurgence has highlighted a shortage of tradespeople experienced in bevel-back timber weatherboard installation. Issues with installation recently seen include:
- not effectively sealing cut ends, notches and holes in boards
- double nailing of timber boards
- poor-quality cutting of mitres to external corners and omitting soakers or backflashings or mitre joints opening up as a result of timber movement
- incorrect installation sequence at internal corners
- sealing of the board laps – this is not recommended as it restricts drainage and drying.
The correct method
Figure 2 gives the correct fixing location. This is a single nail to each board located just above the lap.
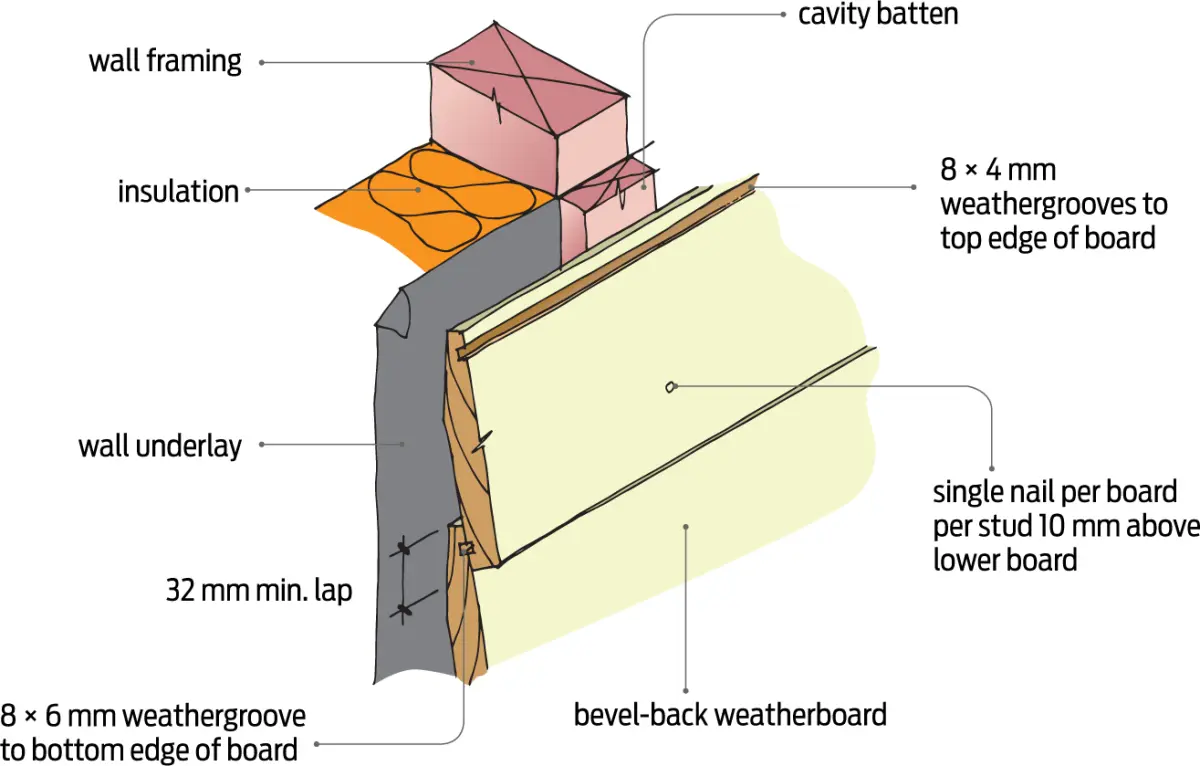
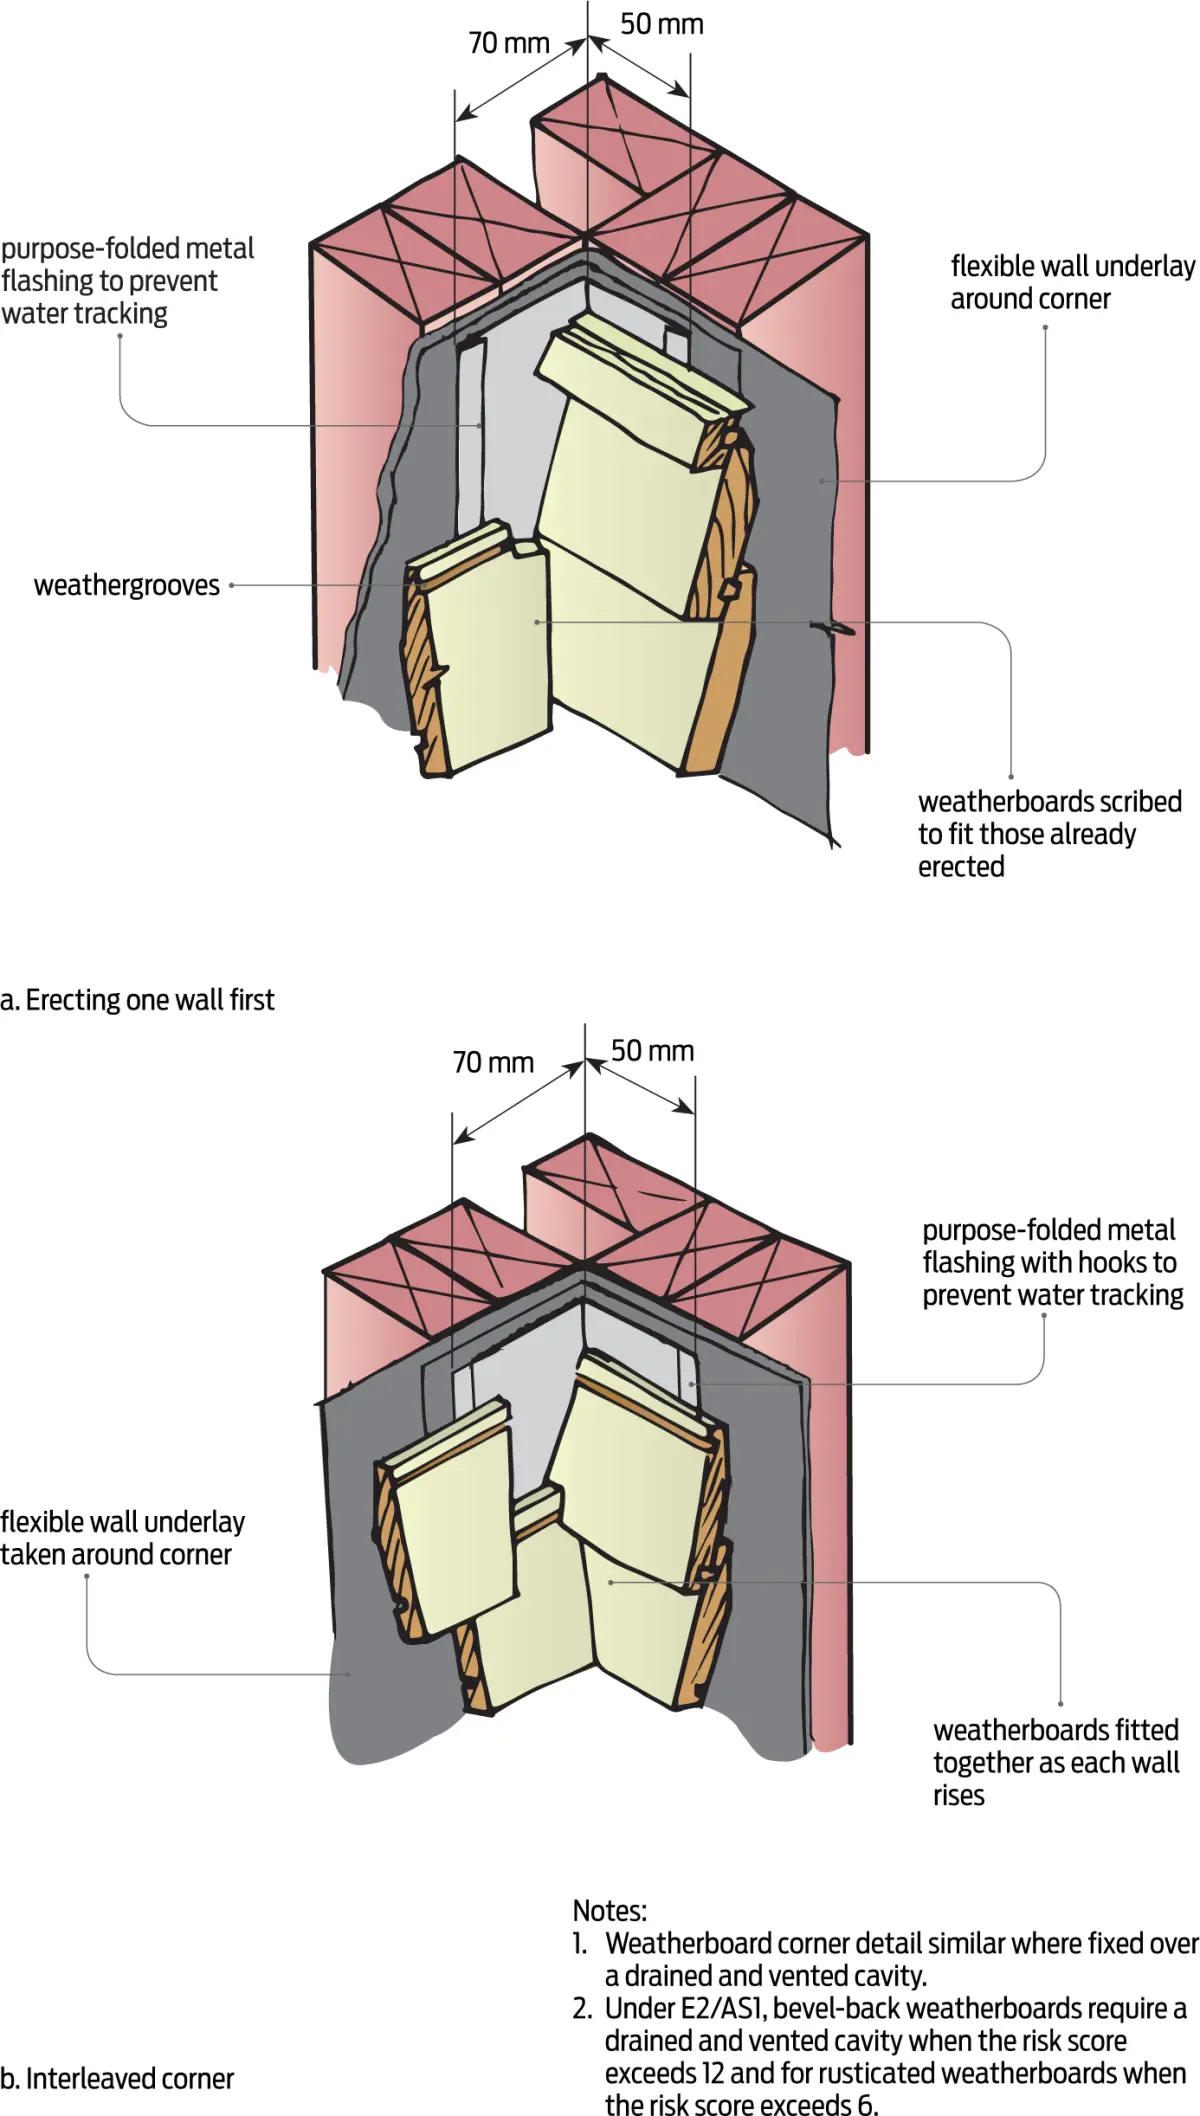
Figure 3 outlines the construction sequence for an internal corner.
Guidance for the installation of timber weatherboards is given in E2/AS1 section 9.4 and in the following BRANZ publications:
- Good Practice Guide Timber Cladding (3rd edition)
- House Building Guide (3rd edition)
- Renovate Bungalows.