


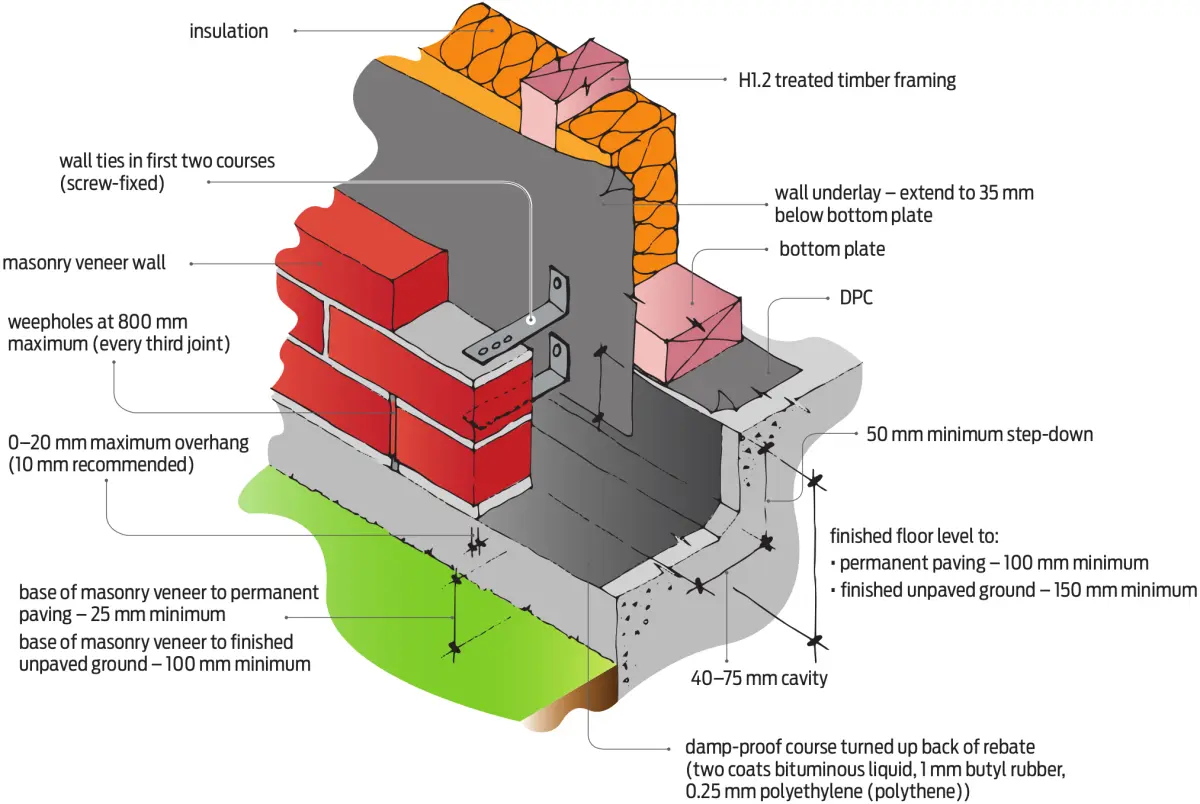
Fired clay brick veneer has long been successfully used as a cladding material (see Figure 1). It is durable without the need for any coating system, and the veneer is well separated from the supporting framing behind, aiding durability.
Two common questions
We are frequently asked about the two key differences between brick veneer and a lightweight cladding such as weatherboard installed over a cavity:
- Why is the cavity so much wider?
- Why are top vents required?
Wider cavity as damp behind
The back of the brick veneer is likely to become damp or wet when it rains because:
- although the clay bricks may be relatively moisture resistant, the cement/sand mortar is not
- windows are not generally sealed into the veneer, so water can enter at these junctions
- mortar often protrudes out the back of the joints.
Most flexible wall underlays billow to some degree into the cavity. A wider cavity is needed to prevent moisture being transferred across the cavity.
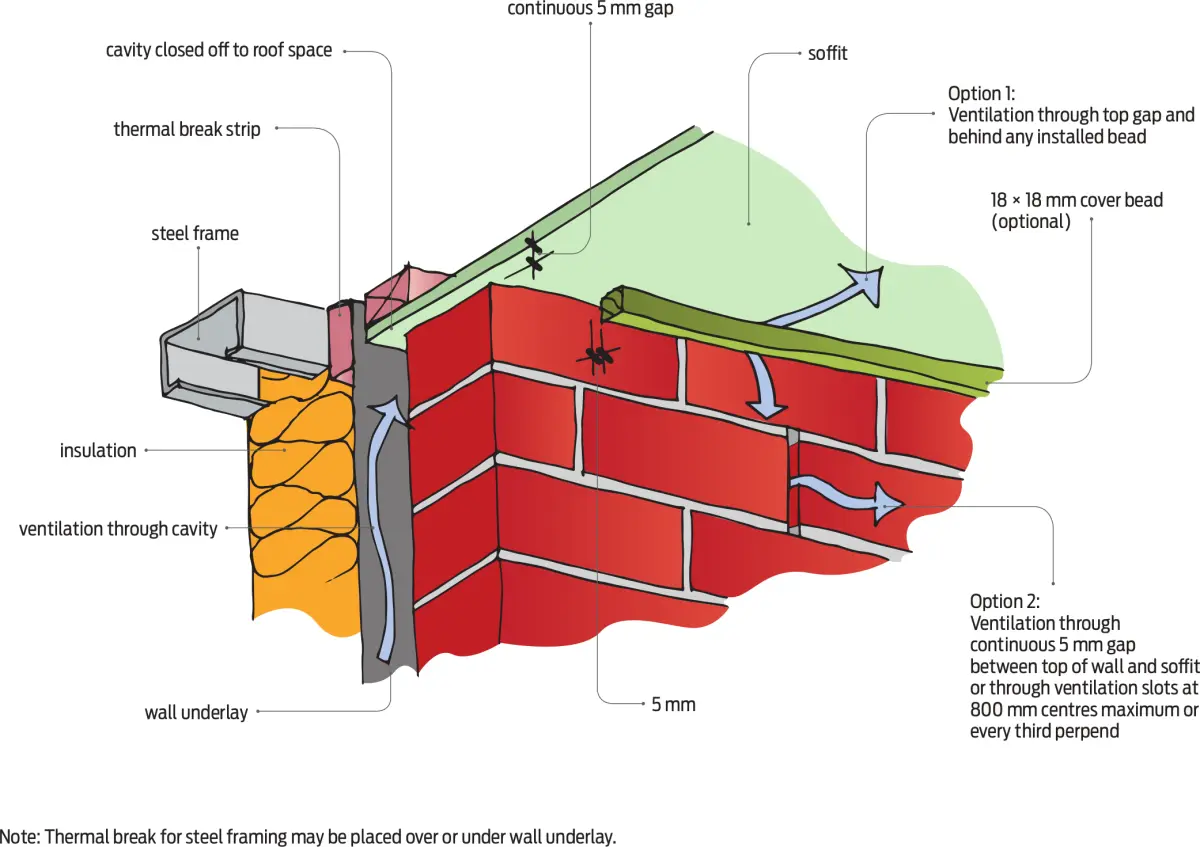
Top vents needed for drying
Top vents as well as the bottom vent and drainage slots are required to dry the back of the veneer. This ensures there is sufficient air movement through the cavity to remove moisture absorbed by the bricks and mortar.
Top venting can be provided by:
- a continuous 5 mm protected gap between the top of the veneer and the soffit lining (see Figure 2)
- leaving every third vertical perpend open. Locating the open perpends in the second to top course means the top course of bricks is less likely to come loose due to the missing vertical mortar.
Key to good detailing
Other key requirements when detailing brick veneer include:
- drainage slots across the top of openings where brick veneer is supported on a lintel bar across the opening
- the top of the cavity is not open to any soffit or roof space
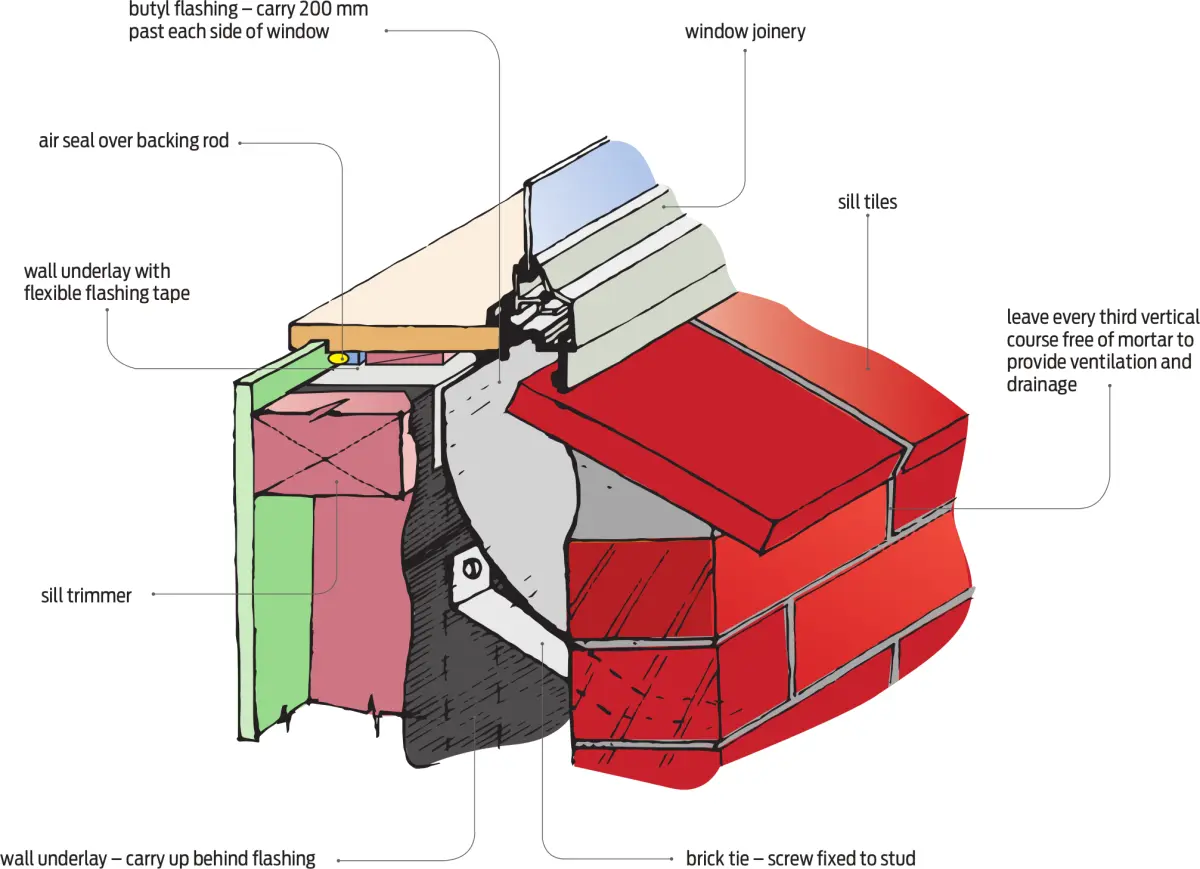
- flexible jamb and sill flashings on windows and doors (see Figure 3)
- drainage slots above the termination of the sill flashing to windows
- ensuring the base of the veneer is at least 50 mm below the interior floor level
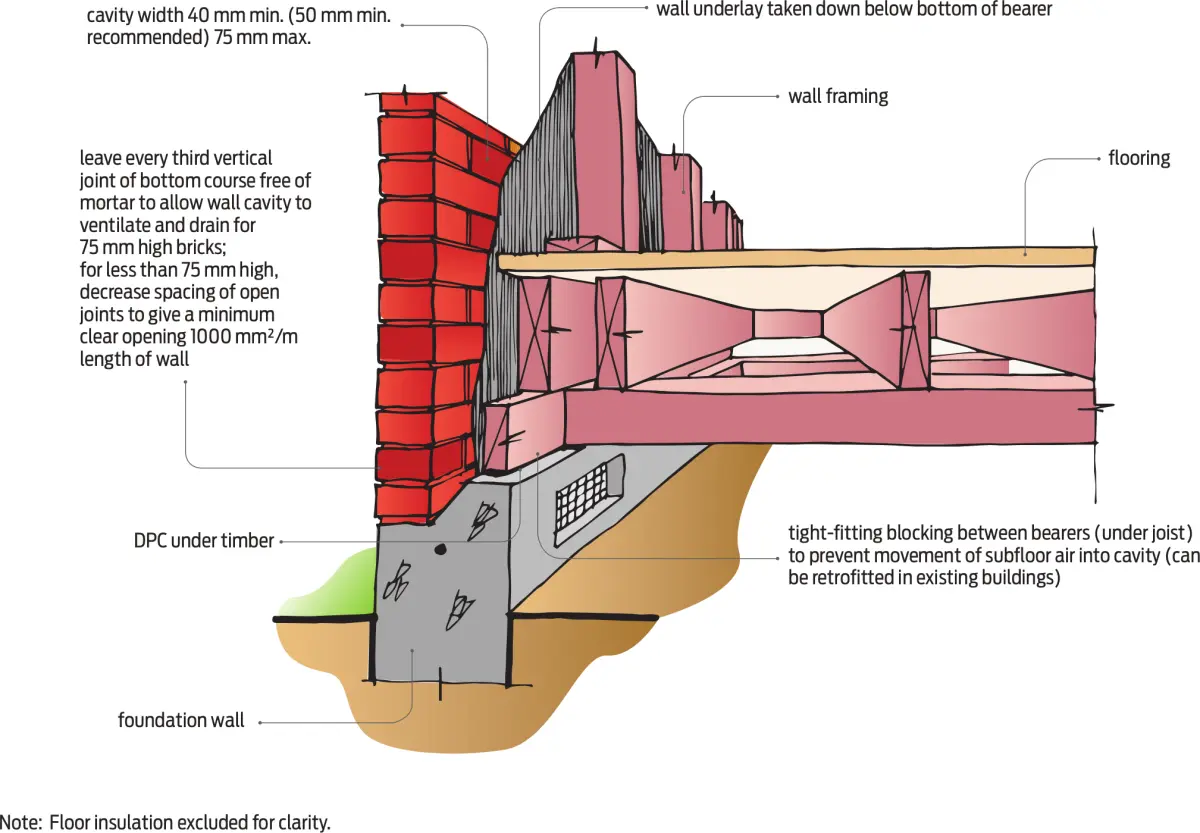
- damp proofing the rebate formed in the slab, foundation wall or bond beam for the veneer (see Figure 4)
- when supported on a foundation wall with a suspended floor, the base of the veneer is not open to the subfloor
- veneer ties slope downwards towards the back of the veneer.
Tips for laying brick veneer
Good practice when laying brick veneer:
- Mortar is used within its open (working time) and is the correct strength.
- Bricks are blended in accordance with manufacturers’ instructions to minimise obvious colour variation across the wall.
- Bricks are wetted in dry conditions to prevent moisture being sucked out of the mortar.
- Ties are wet-bedded in accordance with NZS 4210:2001 Masonry construction: Materials and workmanship. Or, dry-bed in accordance with BRANZ Study Report 152 Investigation of the strength and stiffness of dry-bedded masonry ties in various veneer types.
- Mortar joints are even and horizontally and vertically aligned within the tolerances specified below.
- Recessed or raked mortar joints are more than 6 mm deep, unless otherwise specified (NZS 4210:2001).
- Perpends for drainage and venting are left open
- Mortar droppings are removed from the base of the cavity and from on top of all ties.
- Finished surfaces and adjacent materials such as windows are free of mortar smears or stains.
Stay within the tolerances
Tolerances for bricklaying in the MBIE Guide to tolerances, materials and workmanship in new residential construction 2015 are:
- joints have an average thickness of 10 mm ±3 mm (NZS 4210:2001)
- the face of the veneer is vertical within 10 mm for every 3 m rise in height within a single storey or 20 mm over the total height of a building (NZS 4210:2001)
- courses must be level horizontally to within 5 mm in any direction up to 10 m or no more than 10 mm in total in any direction over 10 m (NZS 4210:2001)
- vertical joints must align to within 3 mm on the fair (visible) face and 5 mm on the structural face (NZS 4210:2001).
- bottom mortar joints are no more than 20 mm thick.