


In Build 167 (pages 33–34), we published two options for head and jamb details that incorporate timber facing boards to an aluminium window installed into a cavity cladding system.
Sill detail
The final part of the installation is the sill detail. It must:
- ensure water is discharged at the sill from the wall and window surfaces
- provide a horizontal line to terminate the base of the vertical facings.
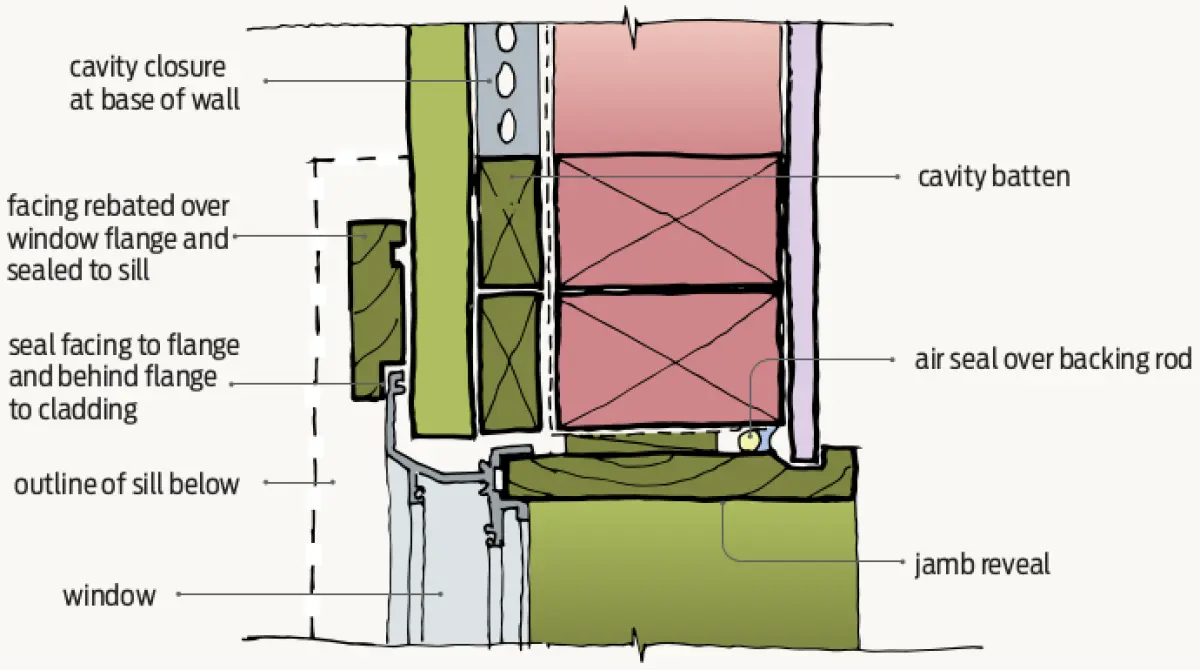
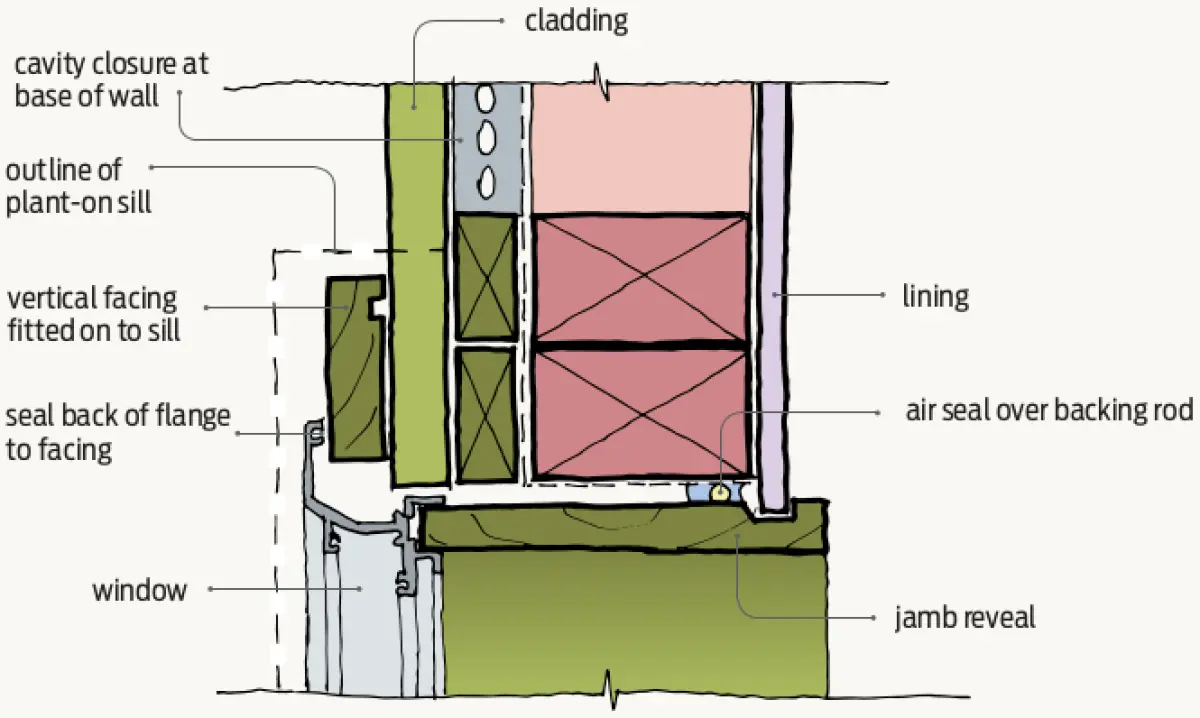
Figure 1 (rebated facing over window flange) and Figure 2 (window flange installed over and sealed to facing) illustrate two options for the jamb detail. In each, the vertical facing is cut and sealed to the timber sill.
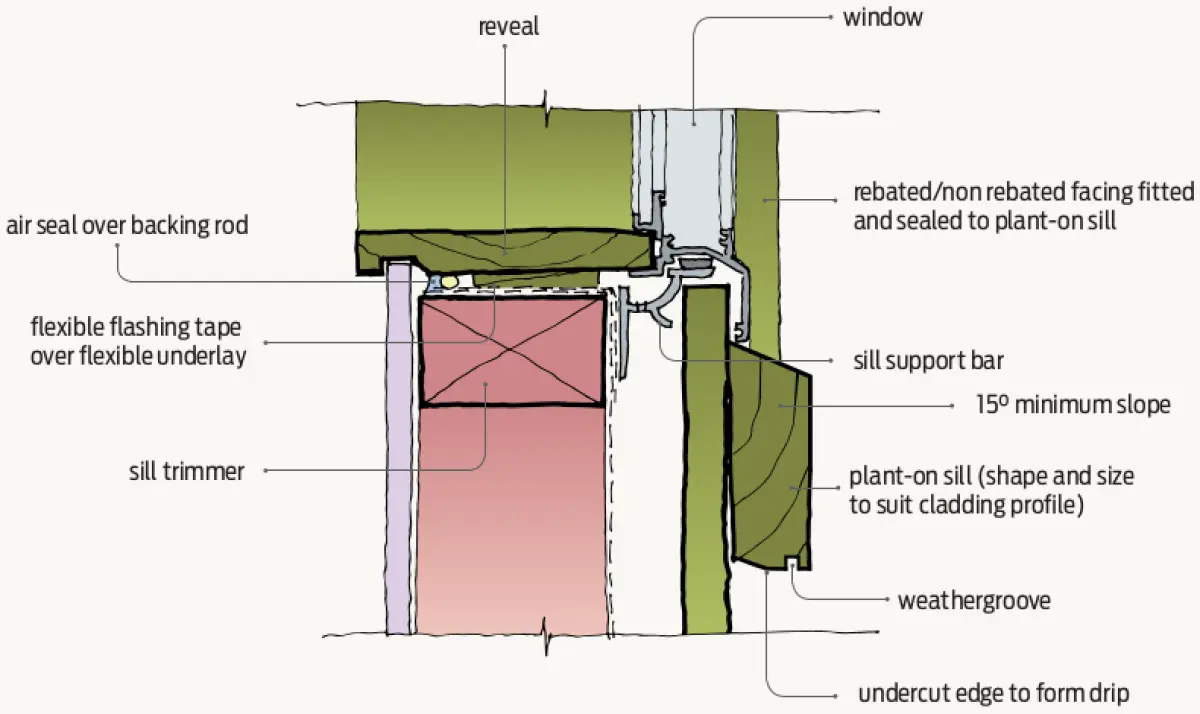
The timber plant-on sill section shown in Figure 3 is modelled on the shape of the front edge of a traditional timber sill. There are, however, a range of shapes the designer can adopt provided the top edge has enough slope to drain surface water effectively.
When installing the facings and sill board:
- fully prime all raw timber before installation
- provide a seal between the window flange and the jamb facing
- seal the end of the vertical facing to the sill
- seal the sill to the cladding.