Detailing garage door jambs

Many new houses include an attached garage. Getting the garage door jamb detail right for brick veneer can be tricky, but here are two options.

Topics include

Windows & doors
Detailing garage door jambs
Last updated 19 May 2026
Share

In housing, the garage floor level is typically at the same level as the adjacent habitable spaces since there is no requirement within the Acceptable Solutions for a set-down.

Difficulties can arise where the slab to the habitable spaces is constructed to meet the minimum heights above paving or ground specified in E2/AS1. This has flow-on effects for:

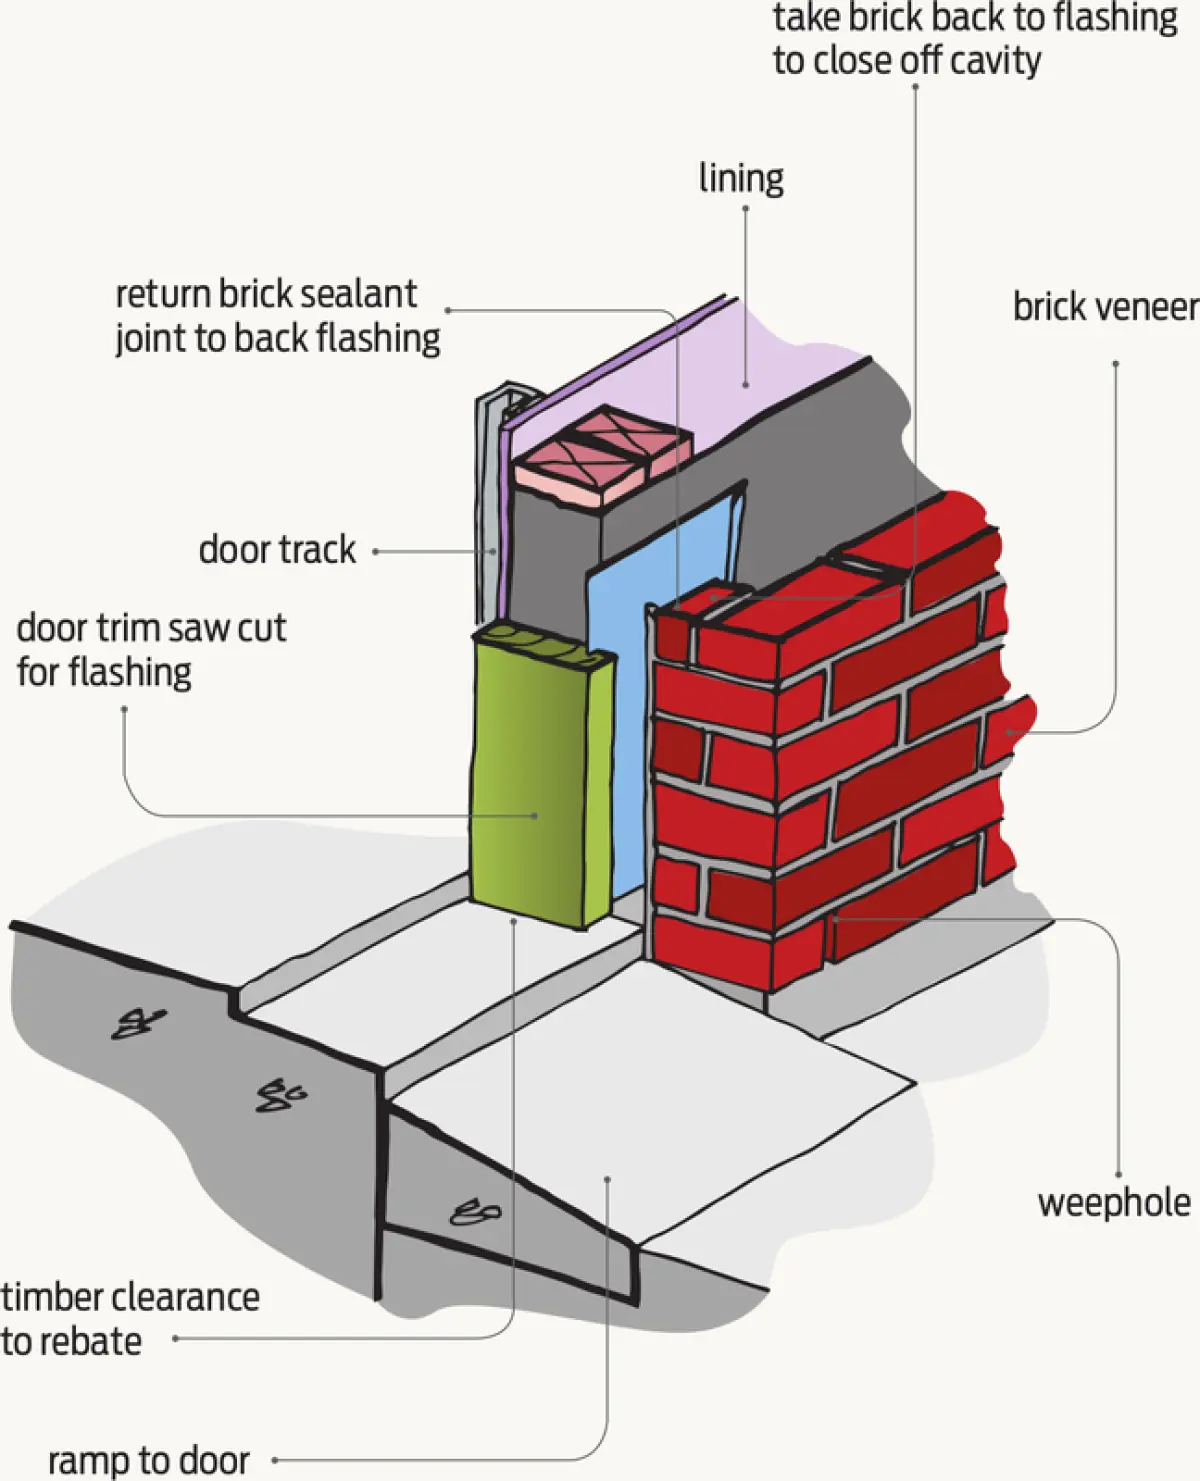
  • weatherboard or other lightweight claddings to ensure the cladding clearances to the outside ground or paving level are maintained, particularly adjacent to the garage door
  • masonry veneers to ensure:
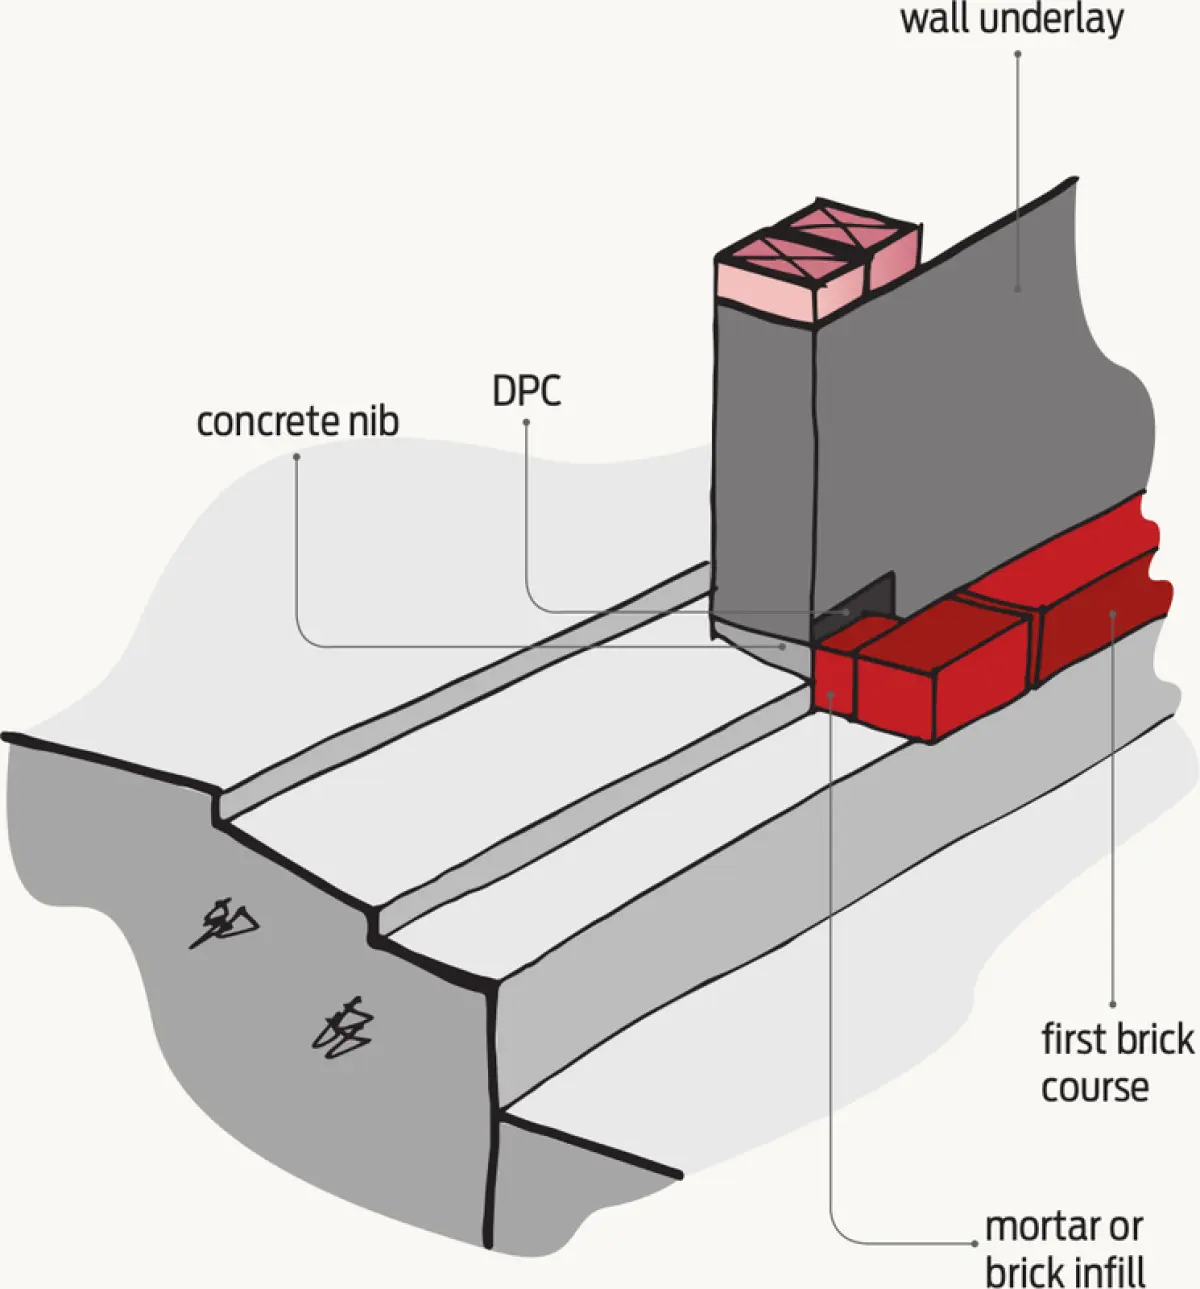
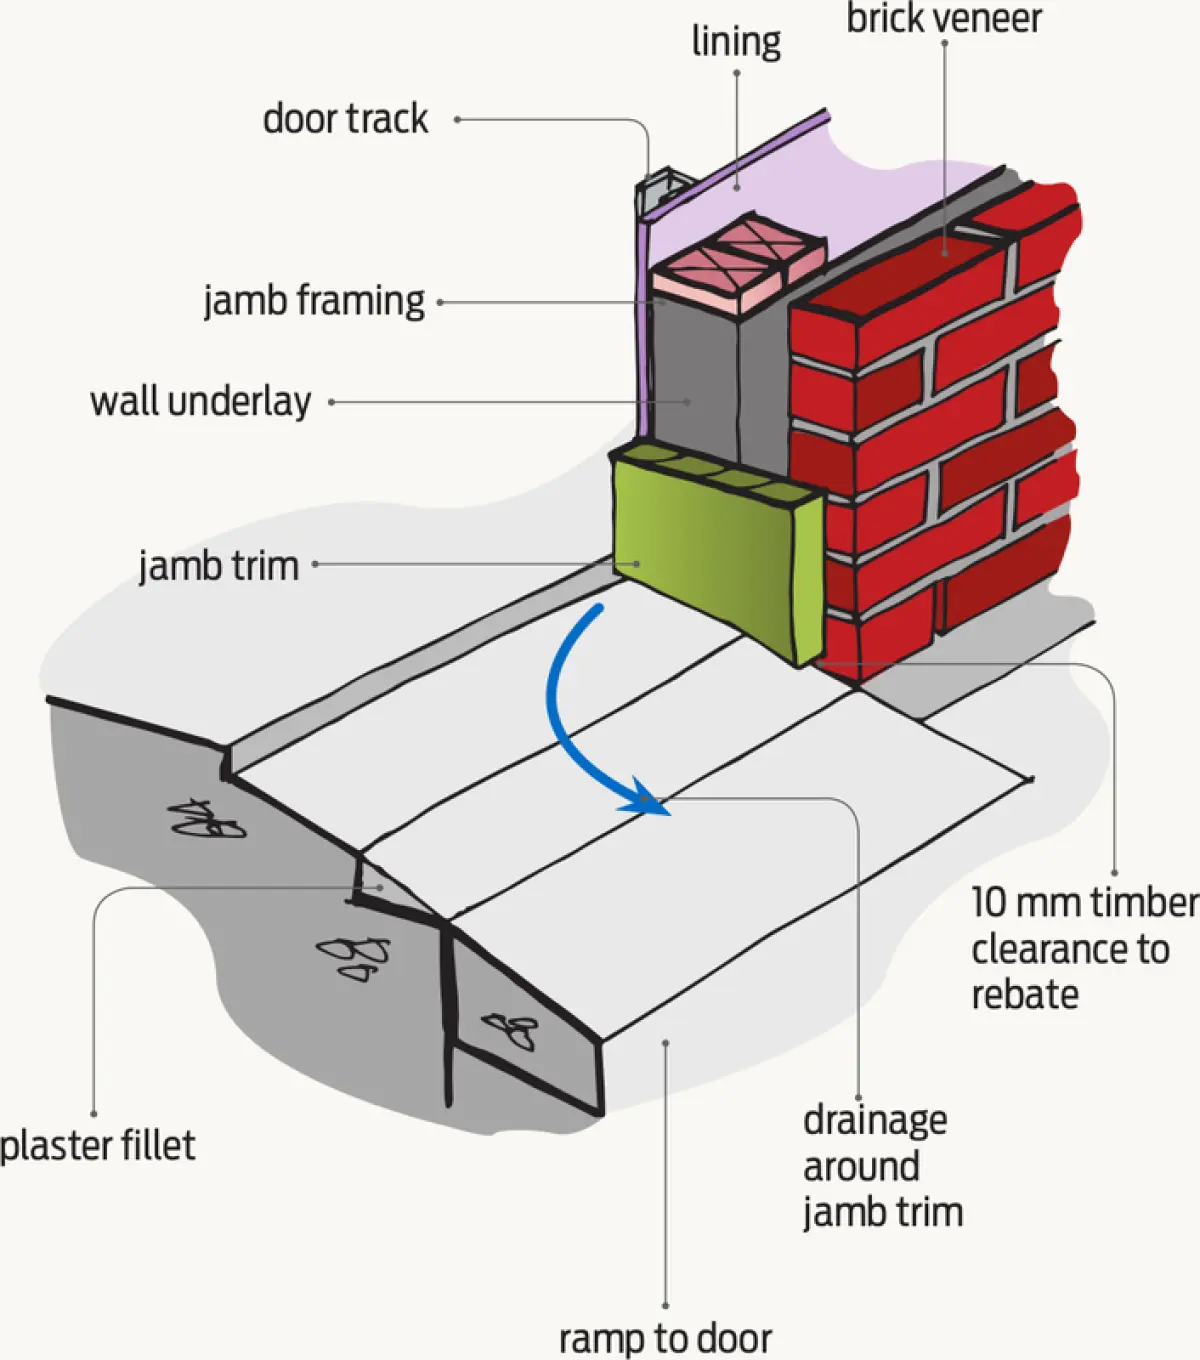
    • cavity drainage is maintained
    • water from outside cannot run into the cavity at the base of the garage door jambs or trims
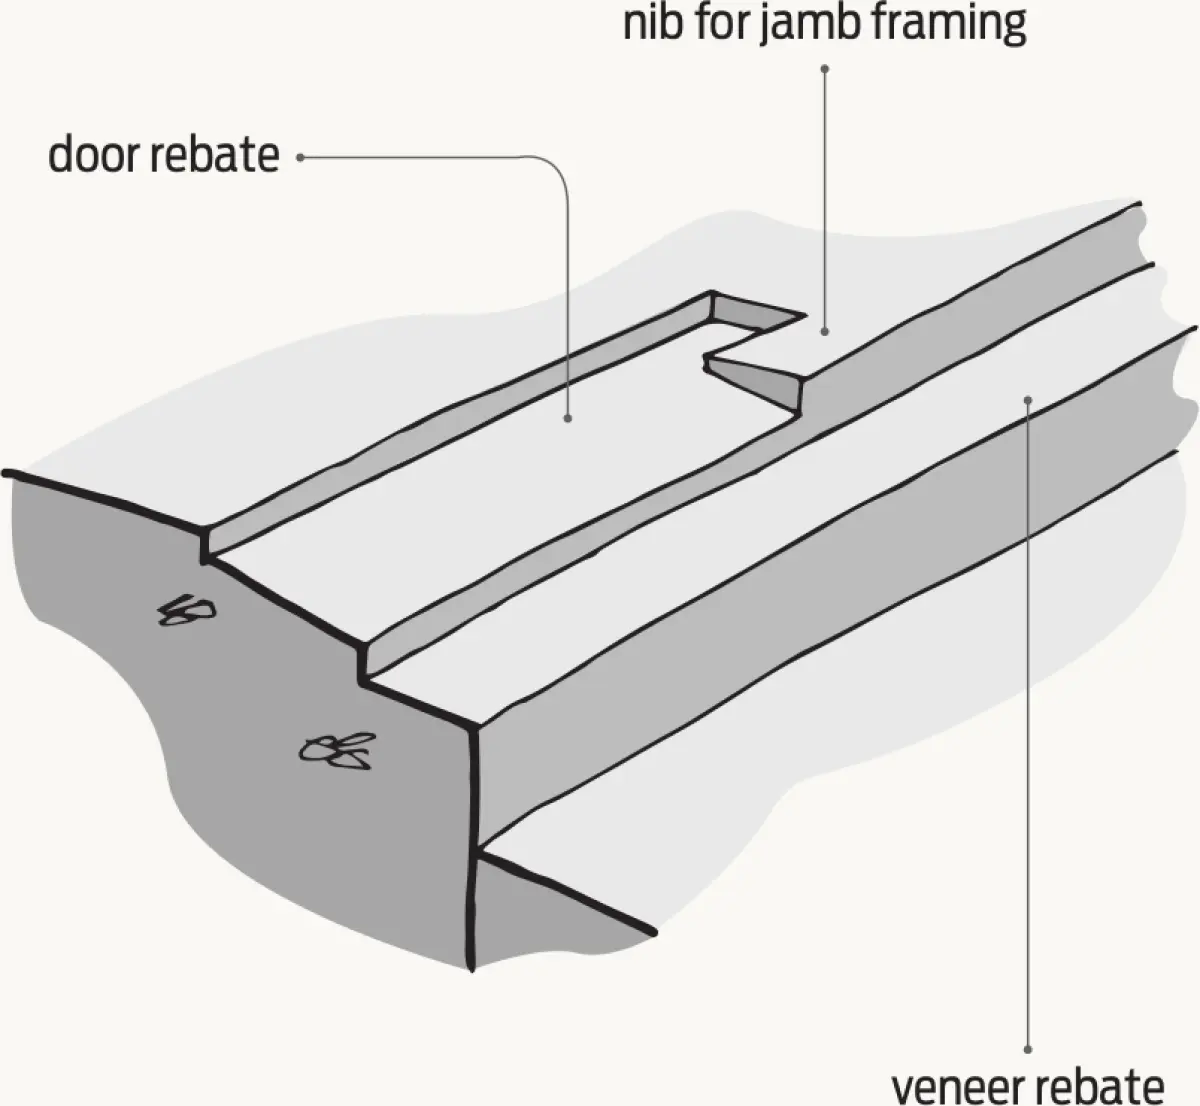
    • the slab set-down specified in E2/AS1 of at least 50 mm is achieved.

Where a garage slab is at a lower level (50–150 mm) than the remainder of the building, the potential issues are exacerbated, particularly on a flat site.

Figures 1–3 and 4–6 outline the construction steps for two jamb detail options.

Diagram showing a garage door threshold detail with a recessed floor slab, a rebate at the opening, and a footing edge beside the slab
Figure 1 Detail 1 – Step 1.
Diagram showing a door base detail with wall framing, wall underlay, backflashing behind the door frame, and drainage space beneath the framing
Figure 2 Detail 1 – Step 2.
Diagram showing a door threshold detail with brick veneer at the side of the opening, a door frame set on a slab rebate, backflashing behind the door trim, and a drainage gap beneath the framing
Figure 3 Detail 1 – Step 3.
Diagram showing a concrete slab with stepped rebates, including a door rebate, a veneer rebate, and a recessed nib formed along the slab edge
Figure 4 Detail 1 – Step 3.
Diagram showing a wall base detail with a concrete nib, damp‑proof course, wall underlay above, and the first course of brickwork set against the wall
Figure 5 Detail 2 – Step 2.
Diagram showing a door jamb and threshold detail with brick veneer beside the opening, a door frame set on a concrete rebate, wall underlay behind the frame, and drainage space at the base
Figure 6 Detail 2 – Step 3.