

The BRANZ helpline often receives questions about replacing windows in existing openings. Typical questions include whether a building consent is required and, as it can be difficult to comply with Acceptable Solution E2/AS1 to Building Code clause E2 External moisture, how a replacement installation could be detailed.
Windows may need to be replaced for a variety of reasons such as the age and condition of the windows or owners wishing to upgrade the thermal performance. Until the 1970s, windows were typically timber framed. Although durable, these deteriorate over time if they are not maintained. Aluminium windows came into the Aotearoa New Zealand market in the 1970s, but now many of the early installations are nearing the end of their life.
Replacement options for windows are typically aluminium or uPVC frames. New timber-framed or steel windows are seldom installed because of their high relative costs. Fibreglass for frames is also an option but, as well as not being readily available in Aotearoa, it is an expensive option.
Building Code requirements
Schedule 1 of the Building Act 2004 sets out building work that does not require a building consent. Part 1 section 1(2) outlines exempted building work and states that ‘Replacement of a building product or assembly [is permitted without a building consent] provided that (a) a comparable building product or assembly is used; and (b) the replacement is in the same position.’ The exception is if the original window has not met the 15-year durability or weathertightness requirements of the Building Code.
While window replacement can generally be done without obtaining a building consent, the structural integrity of the building must not be compromised, and the installation must meet the performance requirements of the Building Code. Note that these options we are considering here are not Acceptable Solutions so will be considered Alternative Solutions, and you will have to satisfy the requirements of your local building consent authority before they are approved.
Thermal performance
Building Code clause H1 Energy efficiency requires that, if the glazing area of a new window is not increased, the R-value of the replacement must be at least the same or better than the original. As timber frames have better thermal performance than aluminium frames, when replacing timber frames with aluminium, it is most likely that double-glazed units are required to meet at least the same window R-value.
Installing a new window
Once new windows have been delivered, existing windows can be removed in preparation for the replacement. Where replacement is required due to age or deterioration of the window, the external wall construction is likely to be with a direct-fixed external cladding. There are occasions where cladding will be installed over a cavity.
Direct-fixed cladding
E2/AS1 requires flexible flashing tape to be installed at each corner of openings in the framing and along the full length of the sill over the wall underlay that has been wrapped into the opening. However, as older homes with direct-fixed cladding typically do not have the wall underlay wrapped into the opening, once the window has been removed, the framing and the condition of the underlay should be checked for soundness.
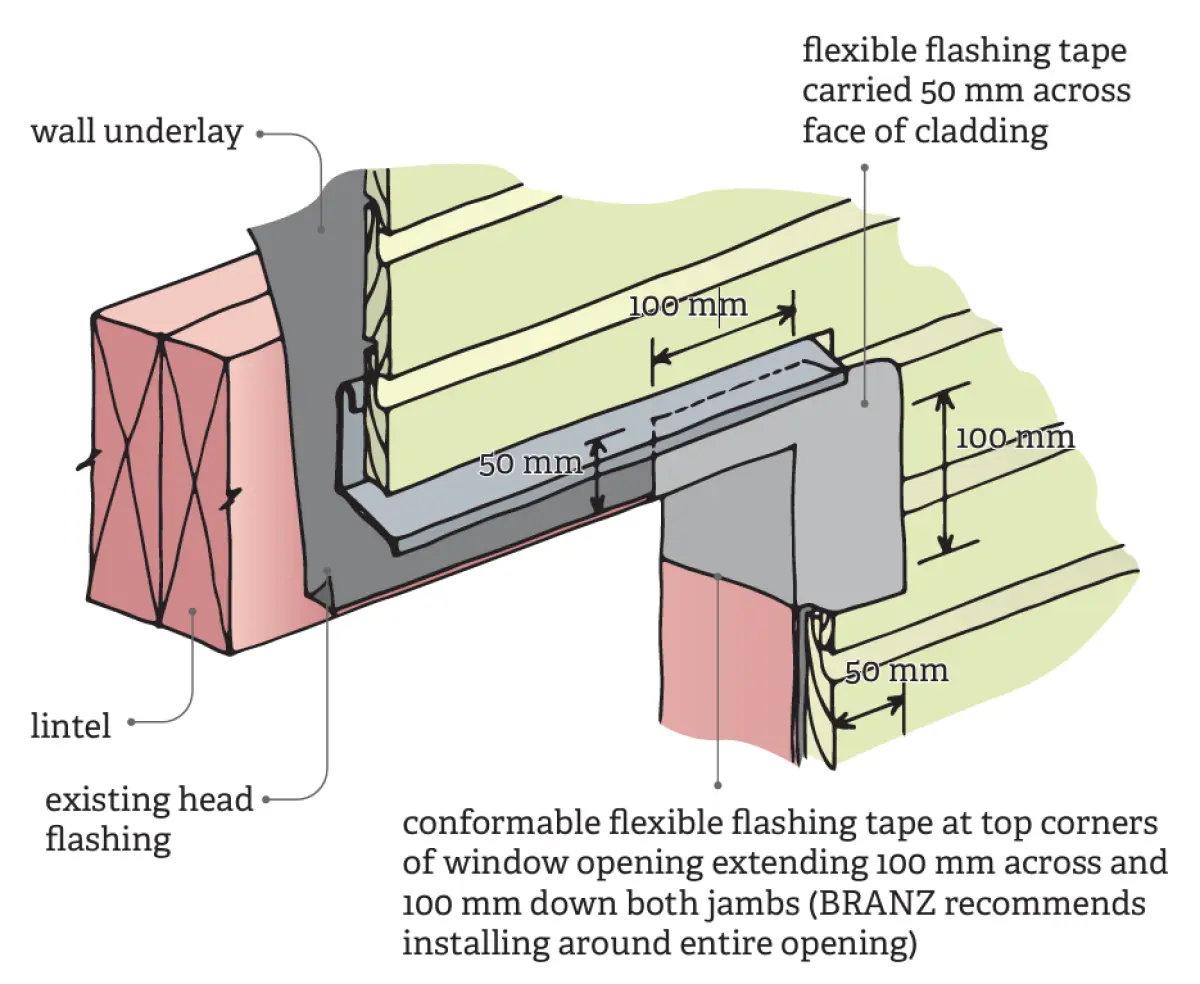
When installing a new window into an existing direct-fixed cladding wall, a conformable flexible flashing tape should be incorporated:
- at the top corners of the opening extending 100 mm across the head and 100 mm down at both jambs and 50 mm over the face of the cladding (Figure 1)
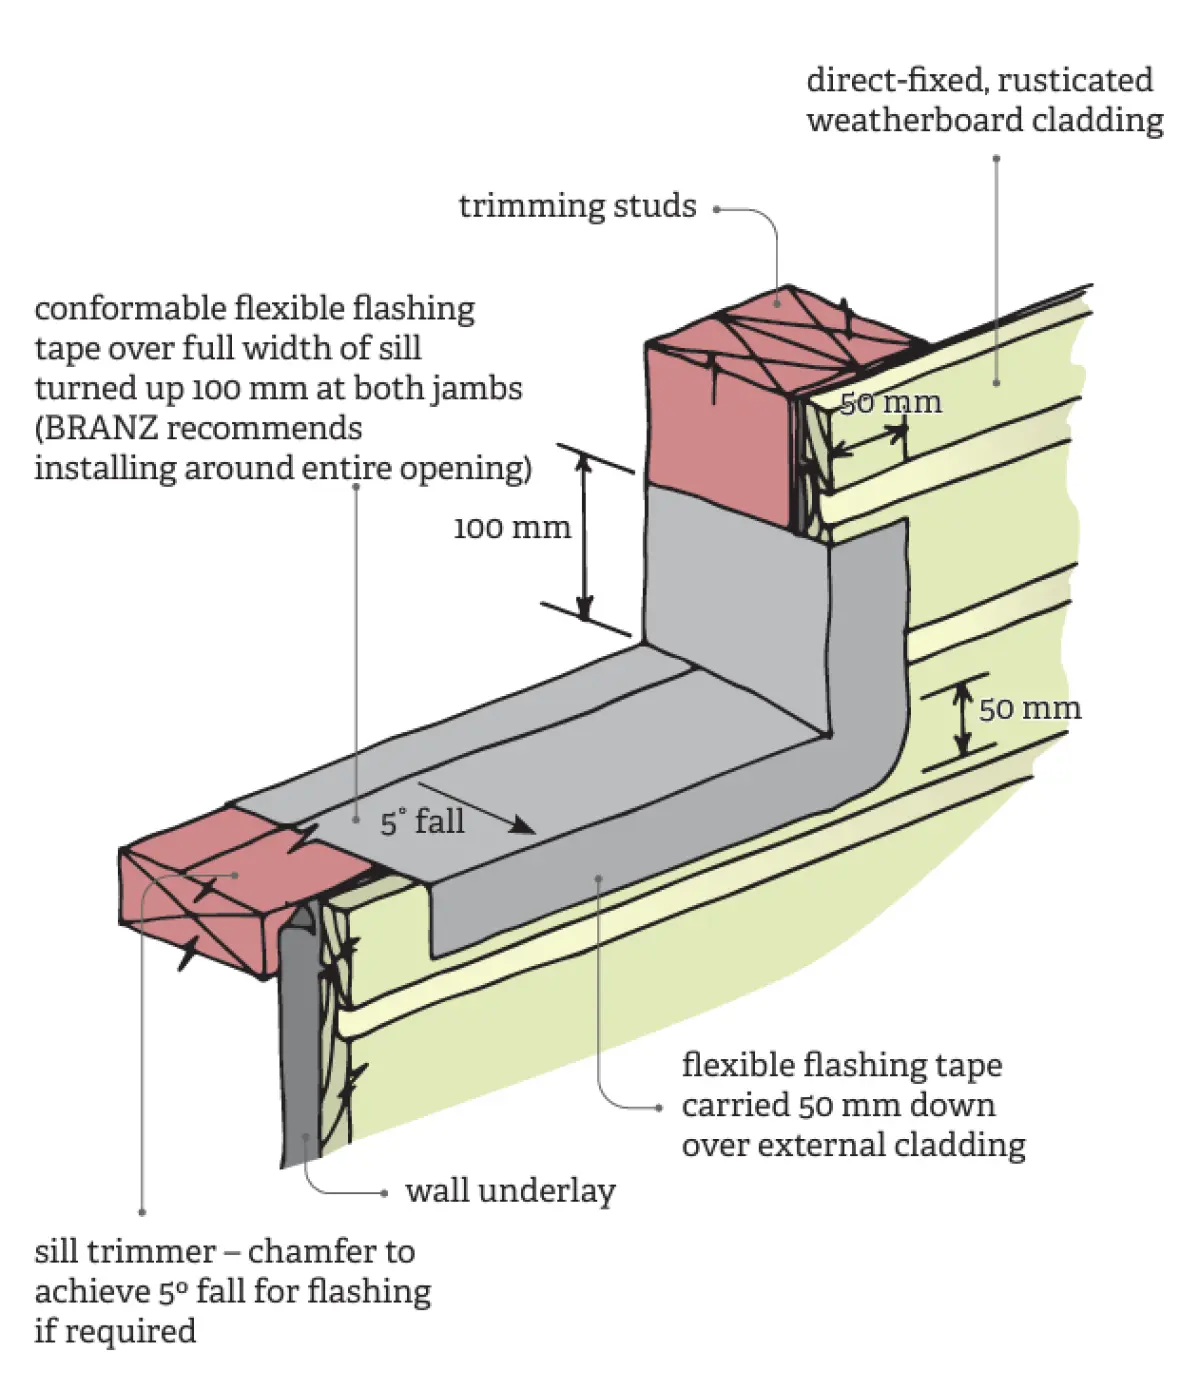
- over the full width of the sill, turned up at both jambs and carried over the external face of the cladding (Figure 2).
If the wall underlay is not folded into the window opening, it is recommended that flashing tape is installed around the entire window opening. In addition, install:
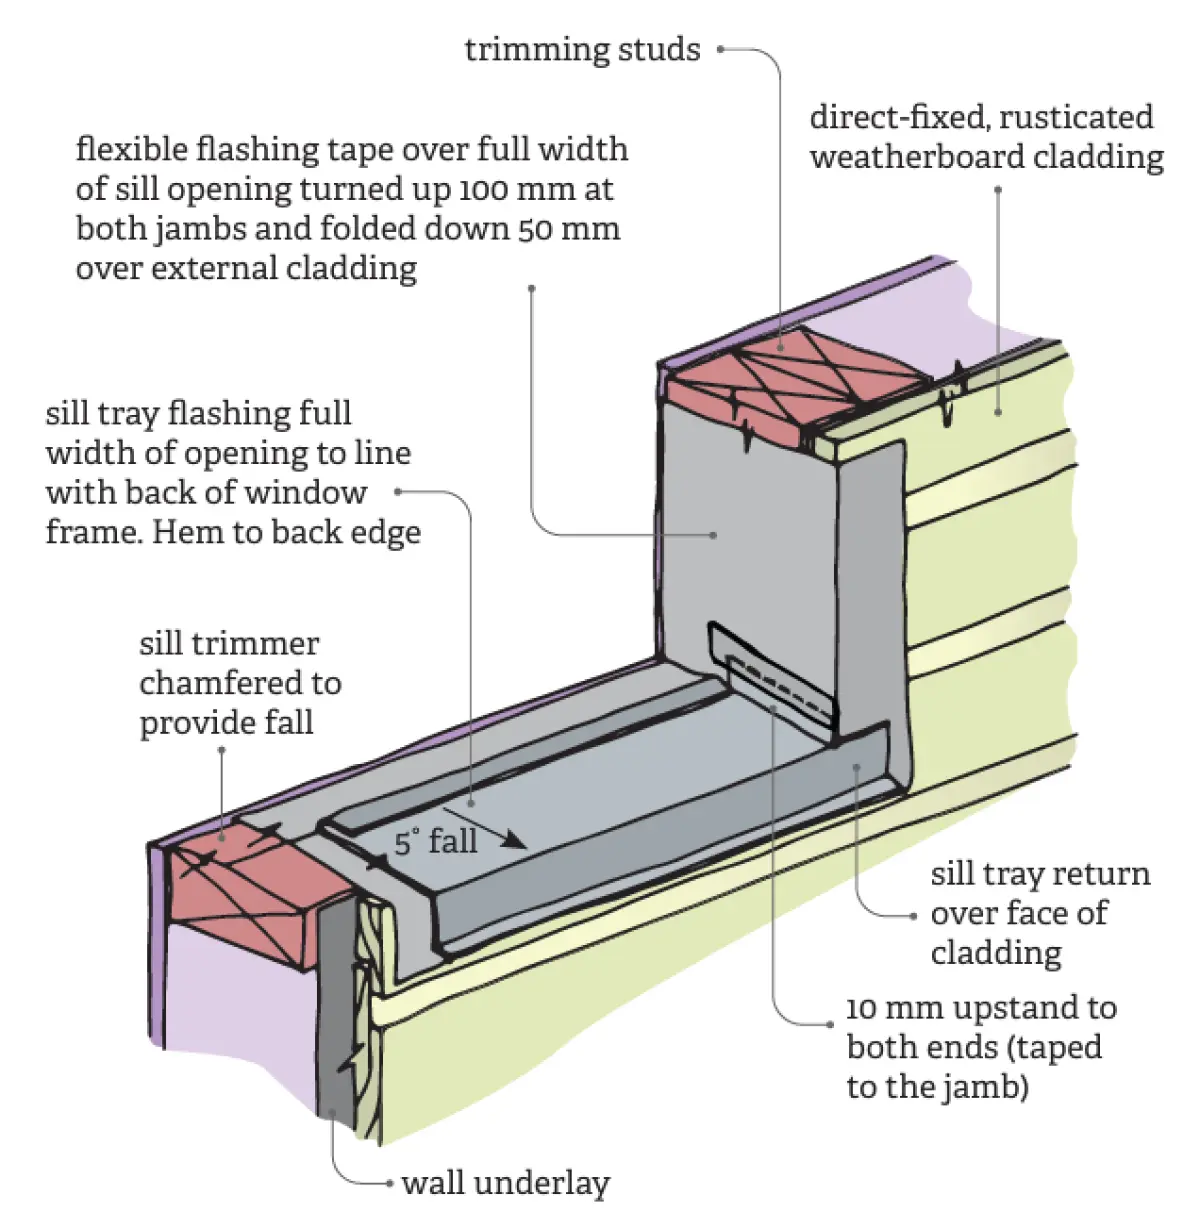
- a full-width sill tray with hem to back edge and upstands and sill tray returns at each end (Figure 3) – this detail is based on installation details in accordance with E2/AS1 prior to Amendment 11
- a continuous, flexible air seal installed around the perimeter of the window over a backing rod in accordance with E2/AS1
- a new head flashing if the existing flashing needs to be replaced.
Note: A conformable flexible flashing tape can be stretched and formed around corners and folded over the external face of the cladding.
Cavity construction
When installing a new window into a wall cladding over a cavity, the installation should be similar to the requirements of E2/AS1 for cavity construction.
Installing a new head flashing
If the head flashing requires replacement, options where the cladding is weatherboard include:
- if the head of the window is within a couple of weatherboards of the soffit, removing the boards above so a new durable flashing can be installed up to the soffit
- fitting a new flashing with the flashing upstand inserted 50 mm minimum into the weatherboard lap above.
For a new head flashing where the cladding is flat sheet, carry the new metal head flashing upstand up the face of the cladding and terminate it at the soffit line behind a timber bead or at the downturn of the inter-storey flashing.
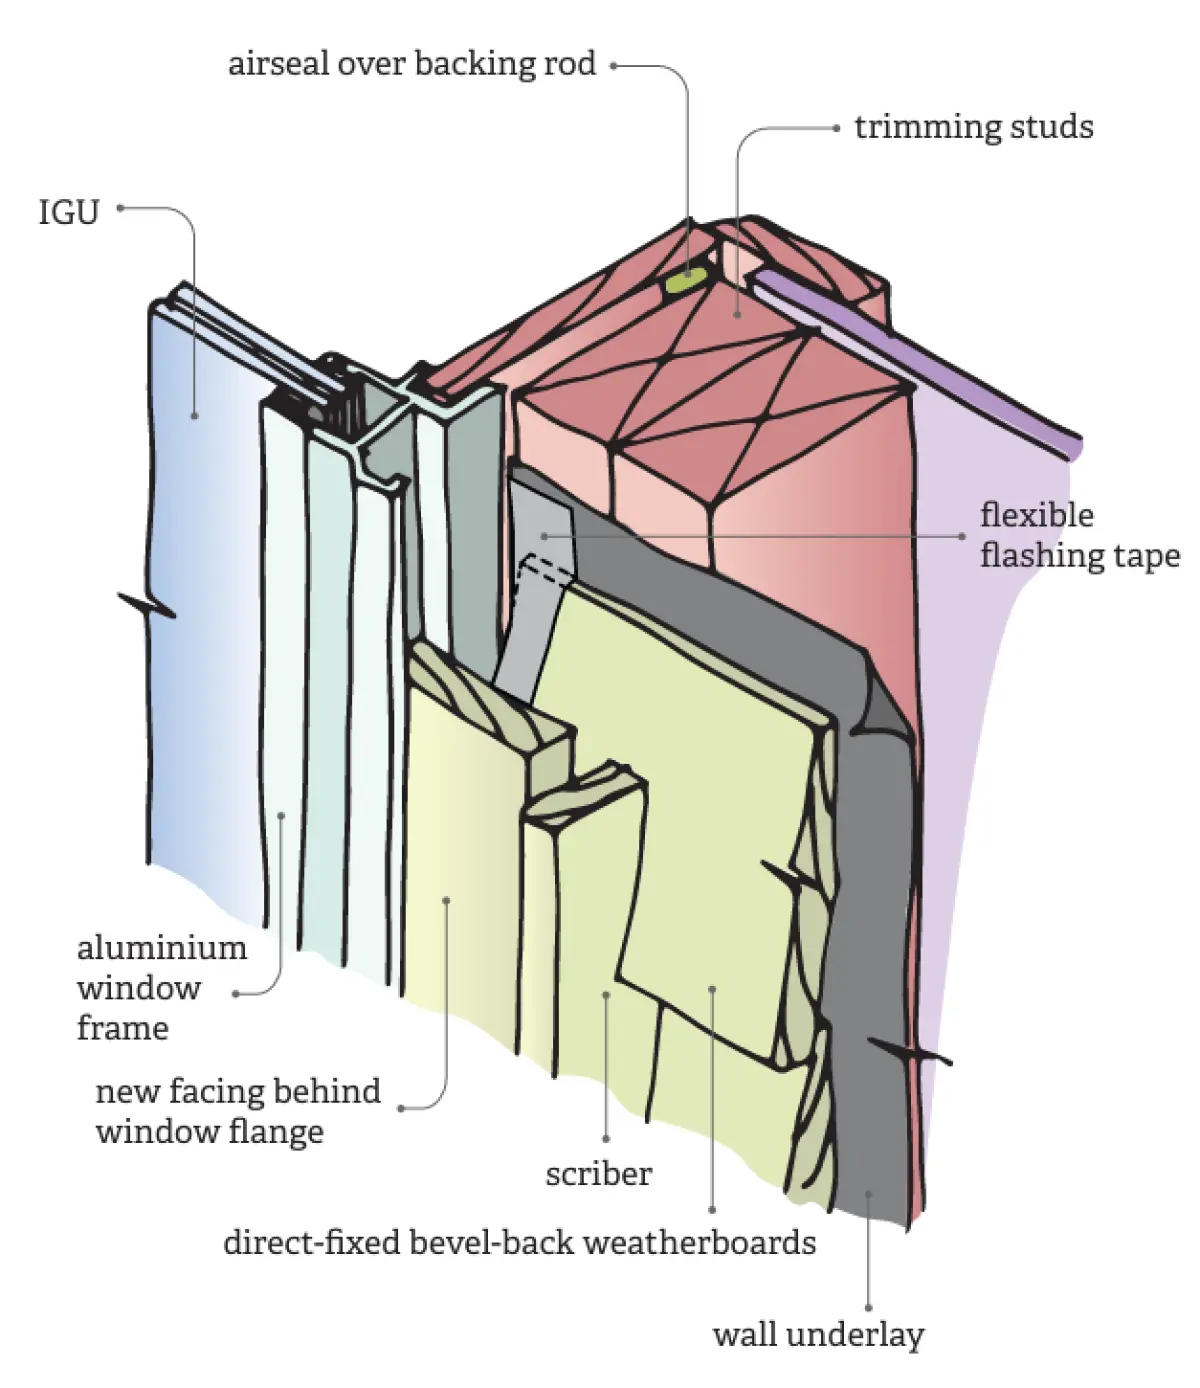
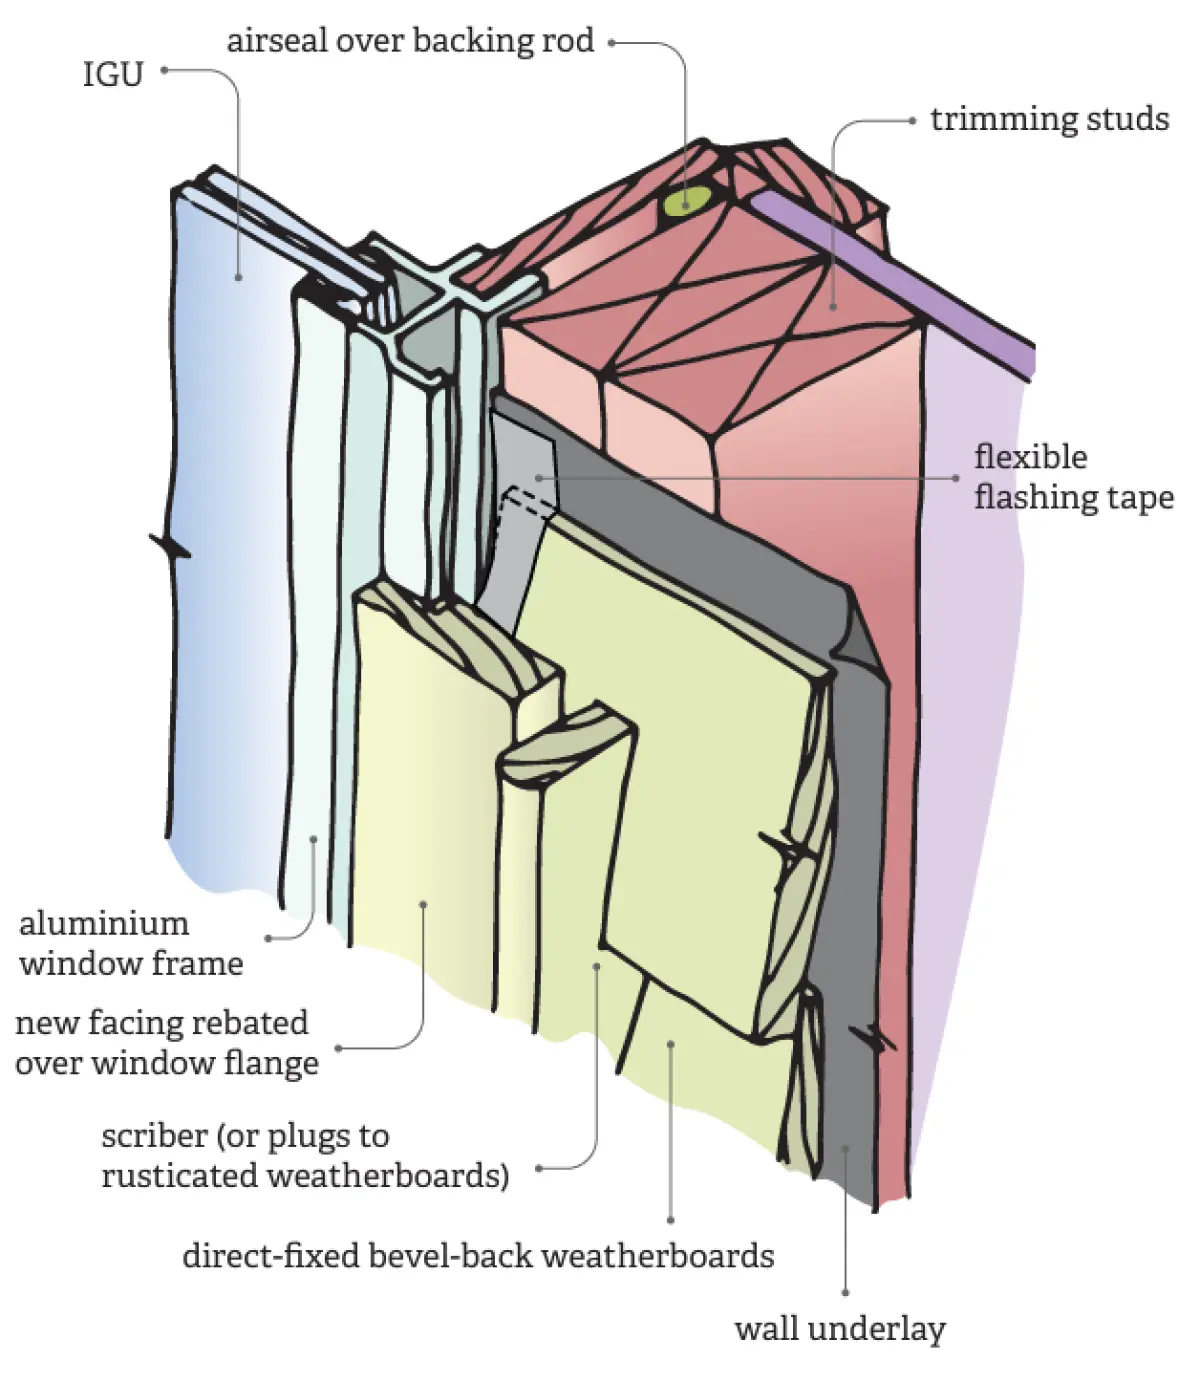
Installing new facings
E2/AS1 requires jamb battens to be installed with direct-fixed claddings but this is sometimes difficult where the existing cladding stops at the trimming studs or where wide facings or flanges to the original window mean that the cladding does not fully extend to the edge of the opening. The new facings will also protect the exposed flashing tape from UV damage. In these situations, alternative options to achieve the minimum cladding cover on the side of the window may include:
- installing new facings before the window is installed (Figure 4) – note that this solution will require the replacement of the head flashing due to the position of the window frame relative to the wall framing and the head flashing should extend 20 mm past the outer, vertical face of the facing or scriber
- fitting facings after the window is installed (Figure 5).
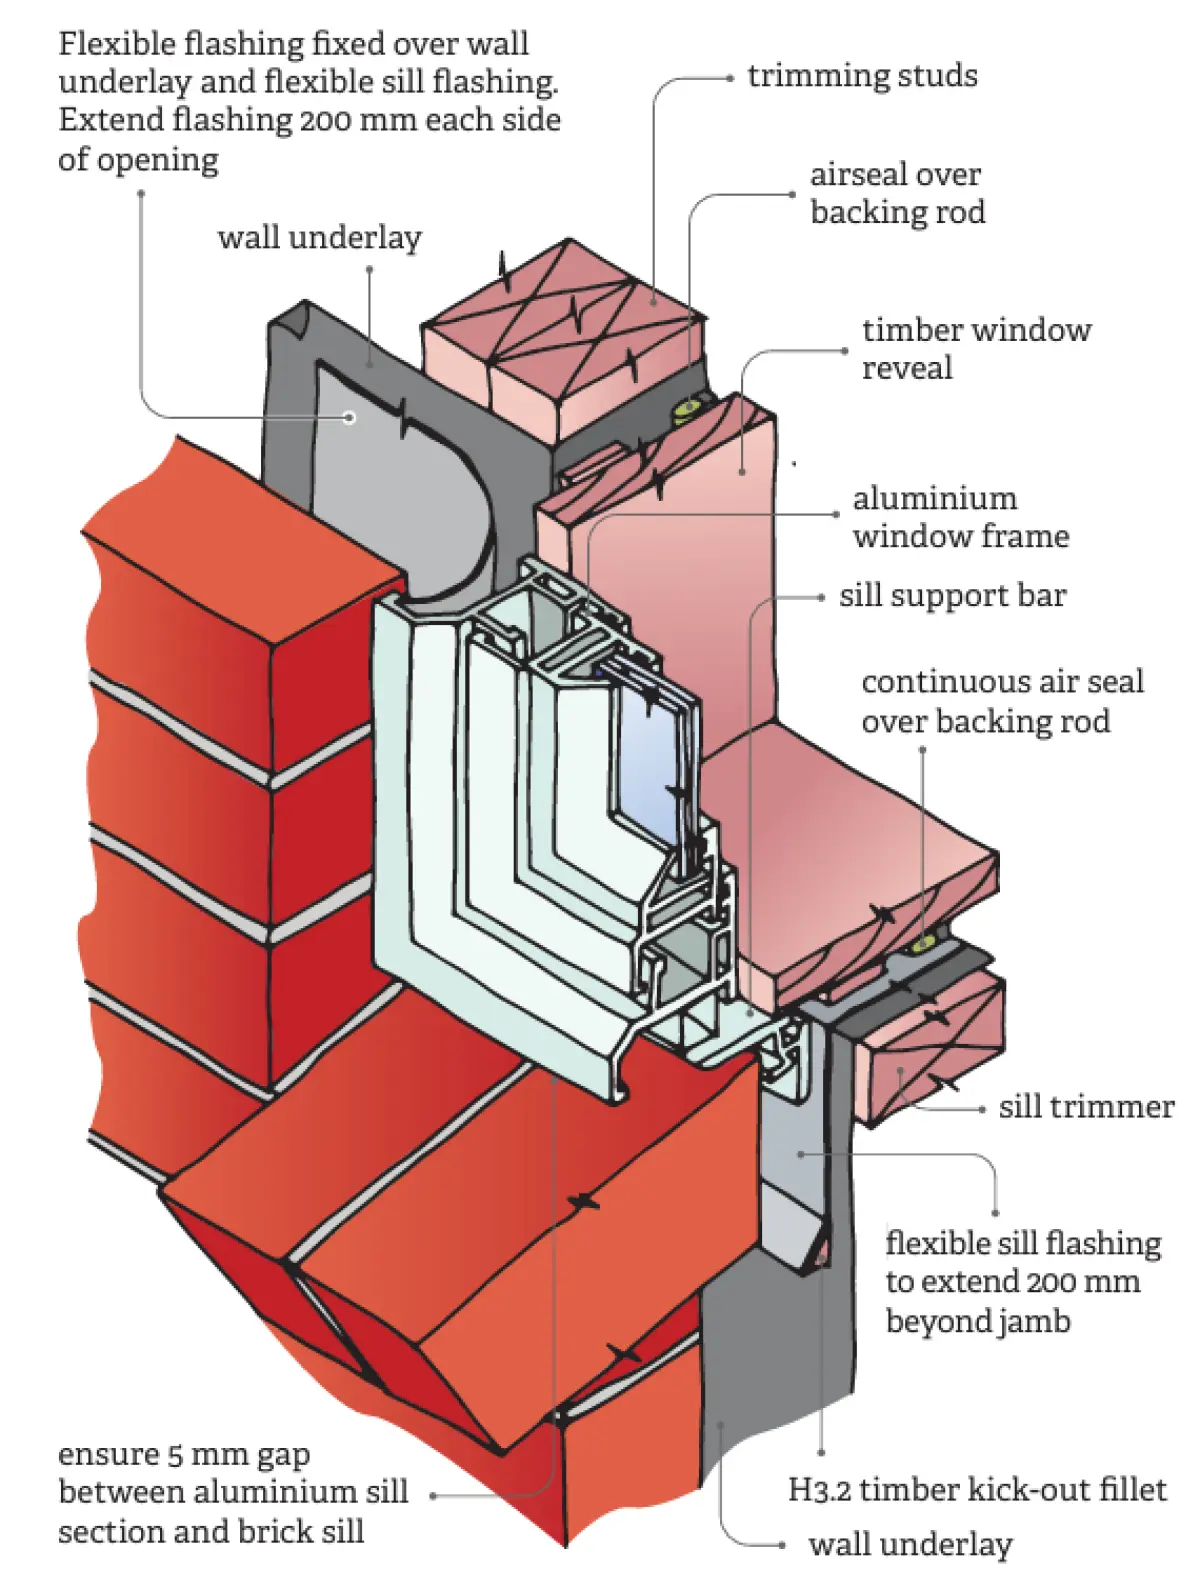
Installing a new window into brick veneer with cavity
Brick veneer cladding will require flexible jamb and sill flashings to be inserted (or existing flashings replaced) into the drainage cavity (Figure 6). It is recommended that a sill support bar is installed to provide support to the window frame where necessary. Ensure that there is a 5 mm gap between the bottom flange of the window and the brick.