

Wet areas such as showers must be lined with an impervious material through which water cannot enter the concealed space behind, to comply with New Zealand Building Code clause E3 Internal moisture.
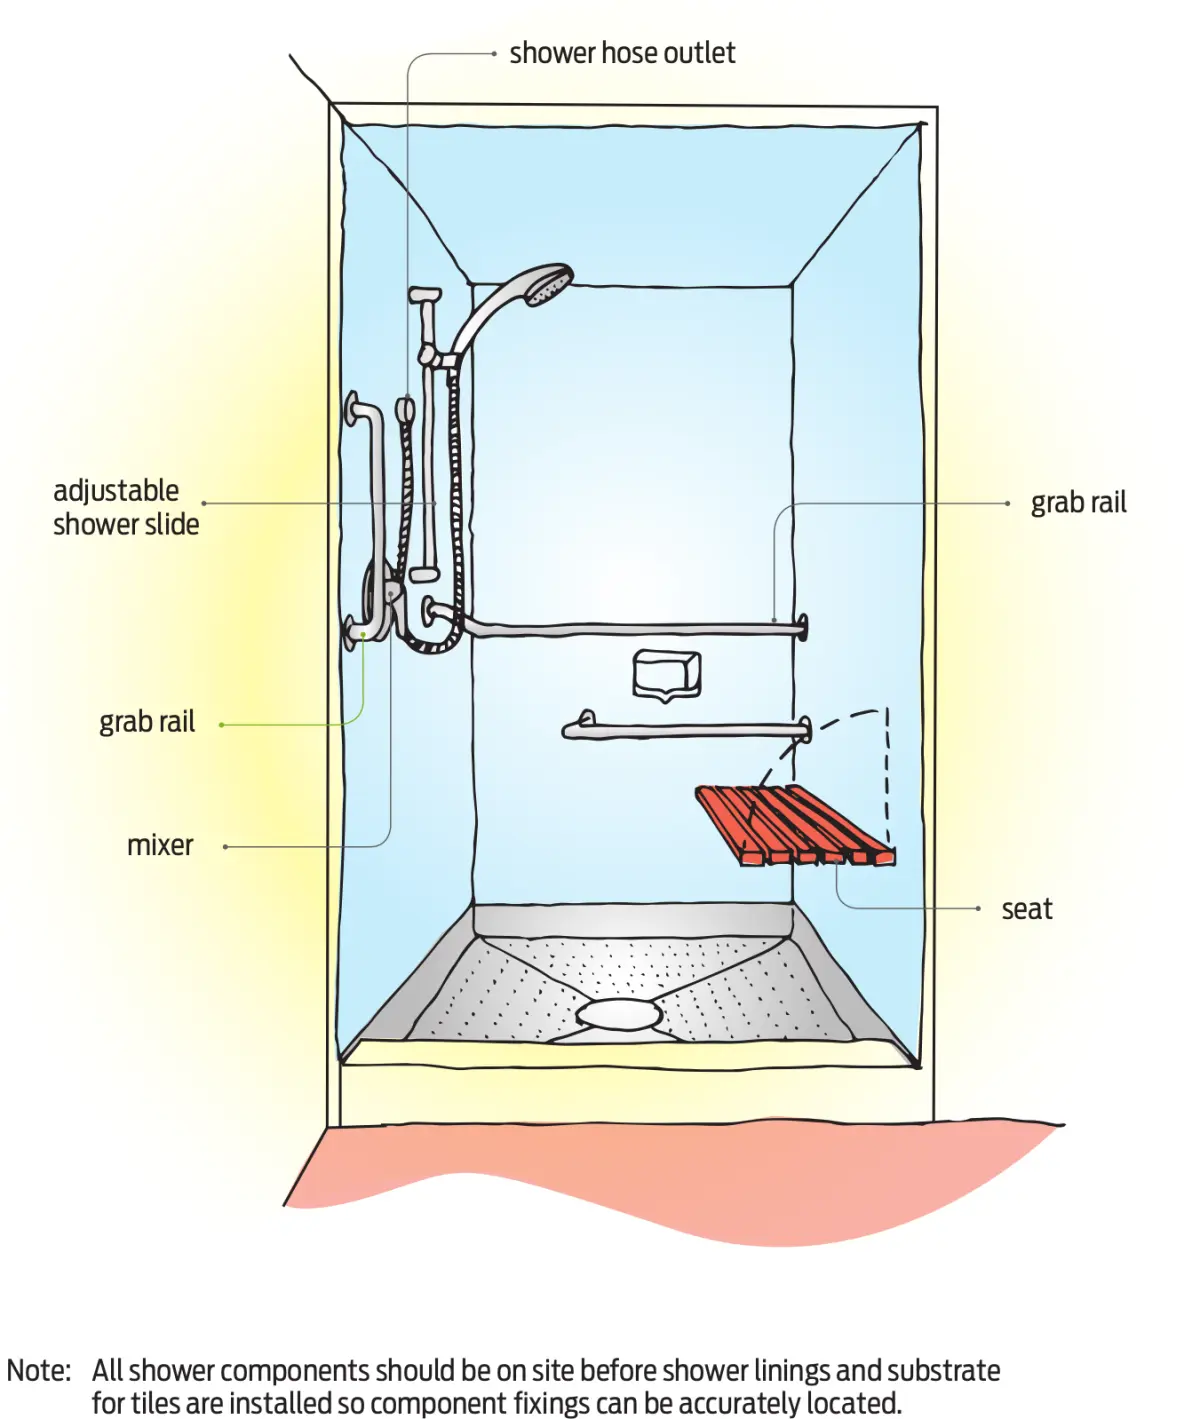
Penetrations must be made through the shower lining material for shower fixtures and fittings (see Figure 1). This is clearly a conflict of function, so how can such penetrations be achieved without compromising the shower waterproofing?
This affects:
- showerheads
- adjustable shower slides and hoses
- mixers
- fixings for grab rails
- shower seats.
Waterproof plumbing penetrations
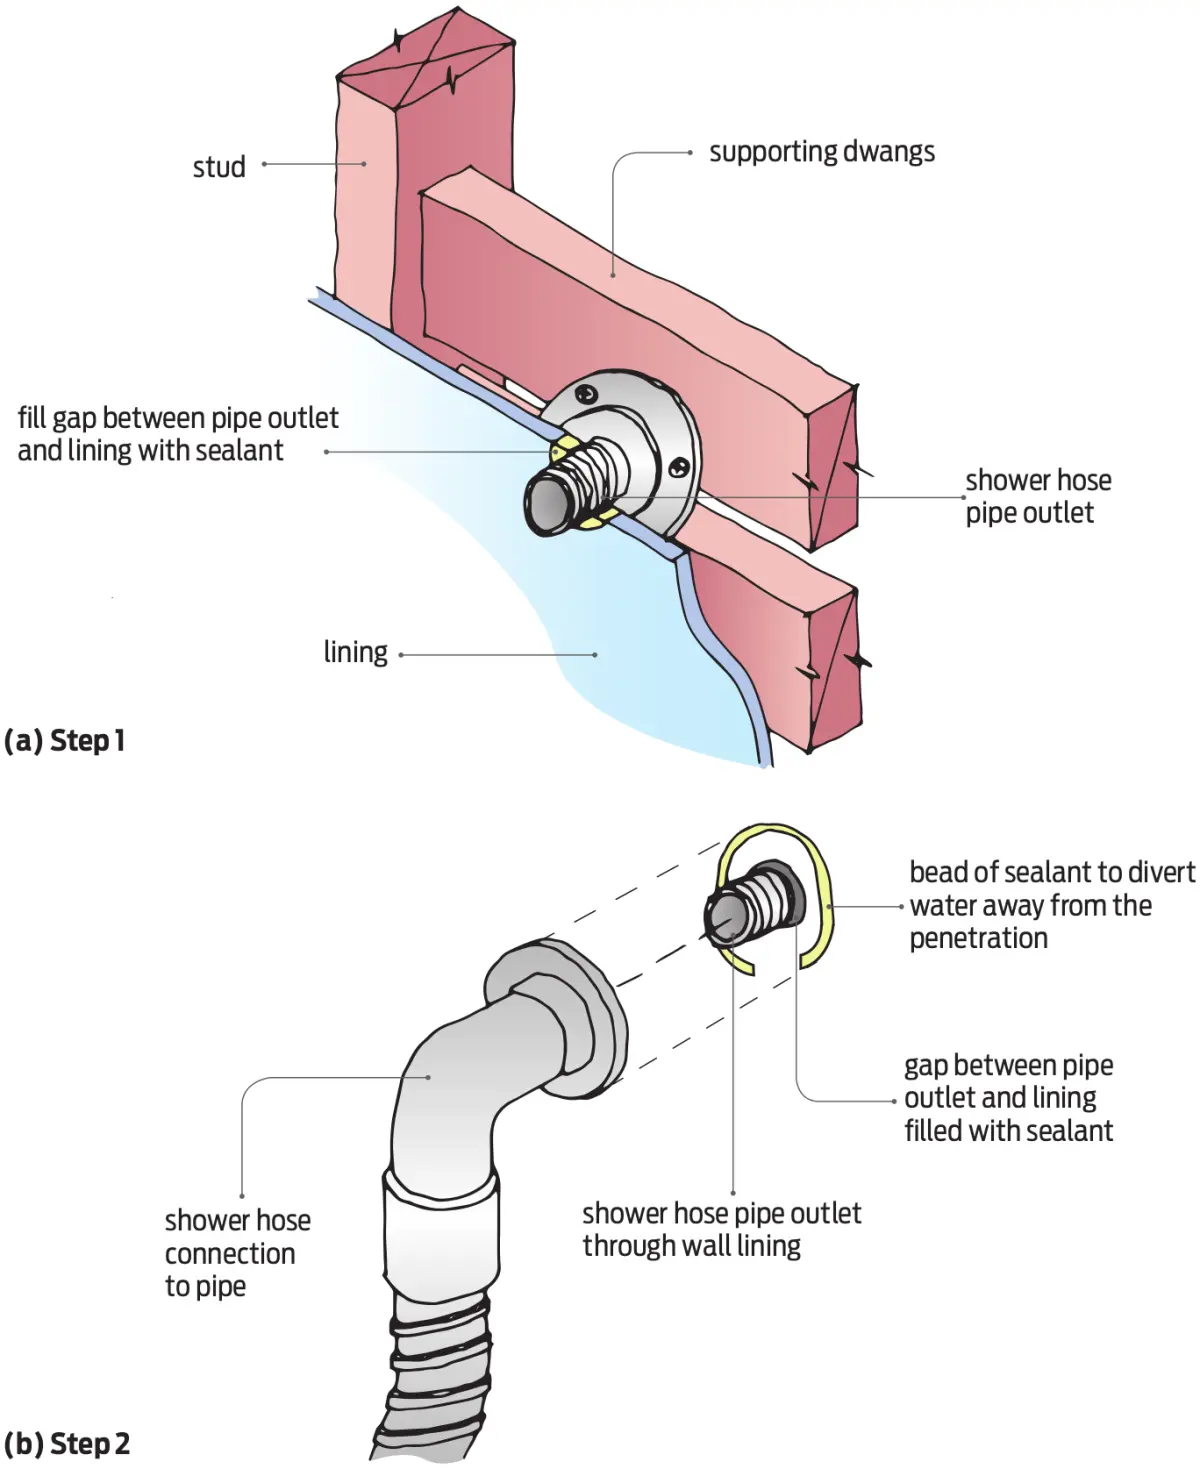
Creating a waterproof penetration for plumbing fixtures such as the showerhead, shower hose and mixer is a two-step installation process:
- Step 1: Cut a hole through the shower lining substrate for the pipe outlet, leaving a 6 mm gap between the pipe and the substrate or lining. Fill the gap completely with silicone sealant (see Figure 2(a)) and then finish the shower lining as required.
- Step 2: Before installing the plumbing fixture cover plate or flange, apply a bead of sealant around the top and sides to fit under the rim of the cover plate. Leave a drainage opening at the bottom so any water that gets behind the cover plate is diverted away from the penetration by the sealant and drains away (see Figure 2(b)). Fit the fixture’s flange or cover plate over the sealant. Some mixer cover plates have a soft foam seal housed into the back.
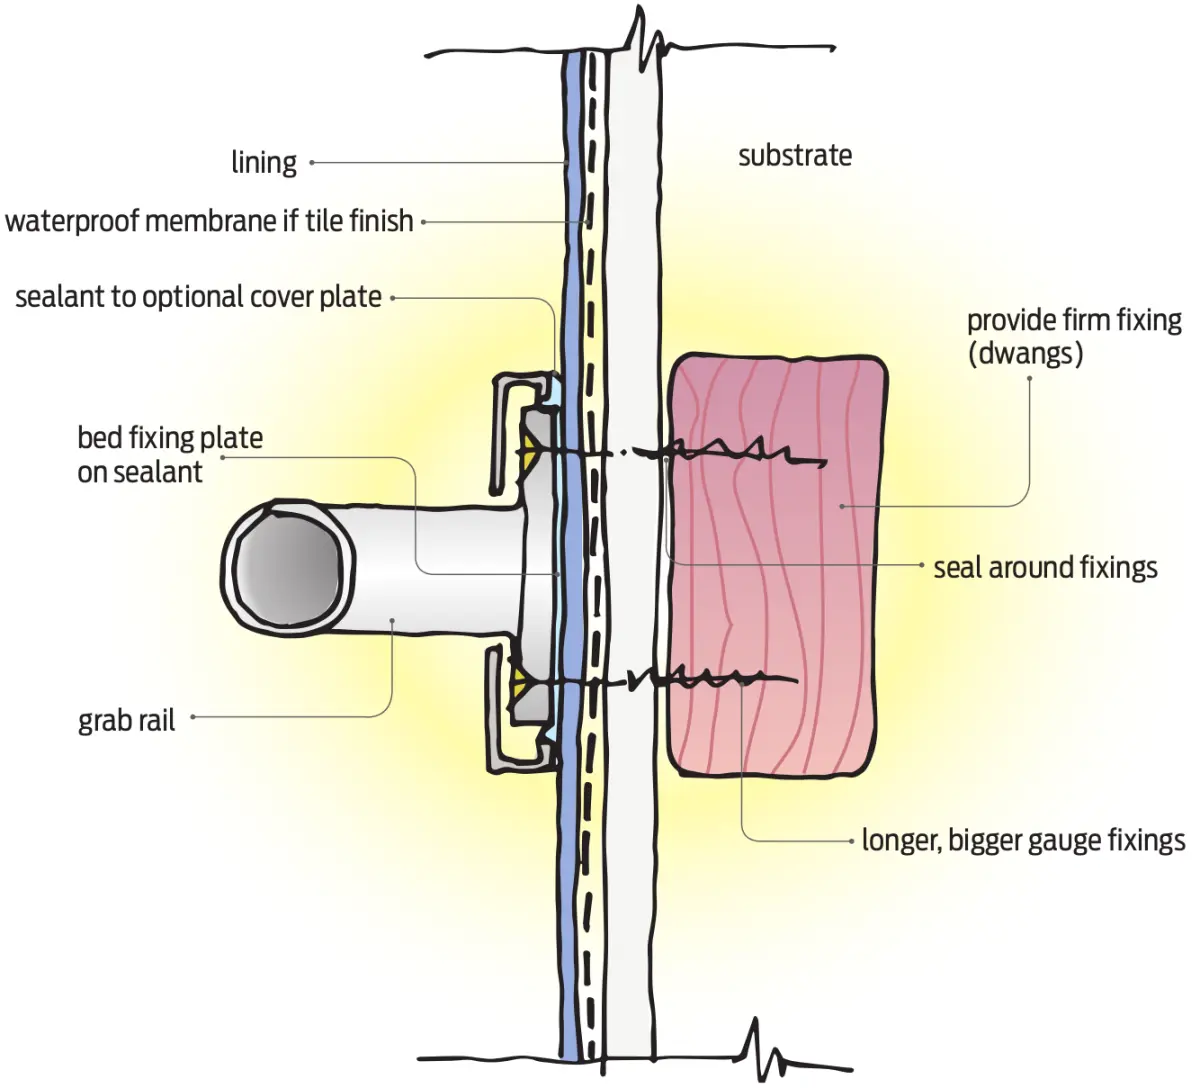
Waterproof penetrations for fittings
Consider locations for fittings such as a grab rail, adjustable shower slide or shower seat at the framing stage as they must be securely fixed into studs or dwangs behind the shower wall lining. Fixings should be sealed to make them waterproof.
Identify, mark and predrill the fixing locations, then fill with sealant before inserting the fixing. Apply sealant to the back face of the plate or bracket before fixing the plate (for a grab rail - see Figure 3) or bracket (for a shower seat) through the shower wall lining. If a cover plate is to be fitted, apply additional sealant to the back face of the cover plate before setting it into position.