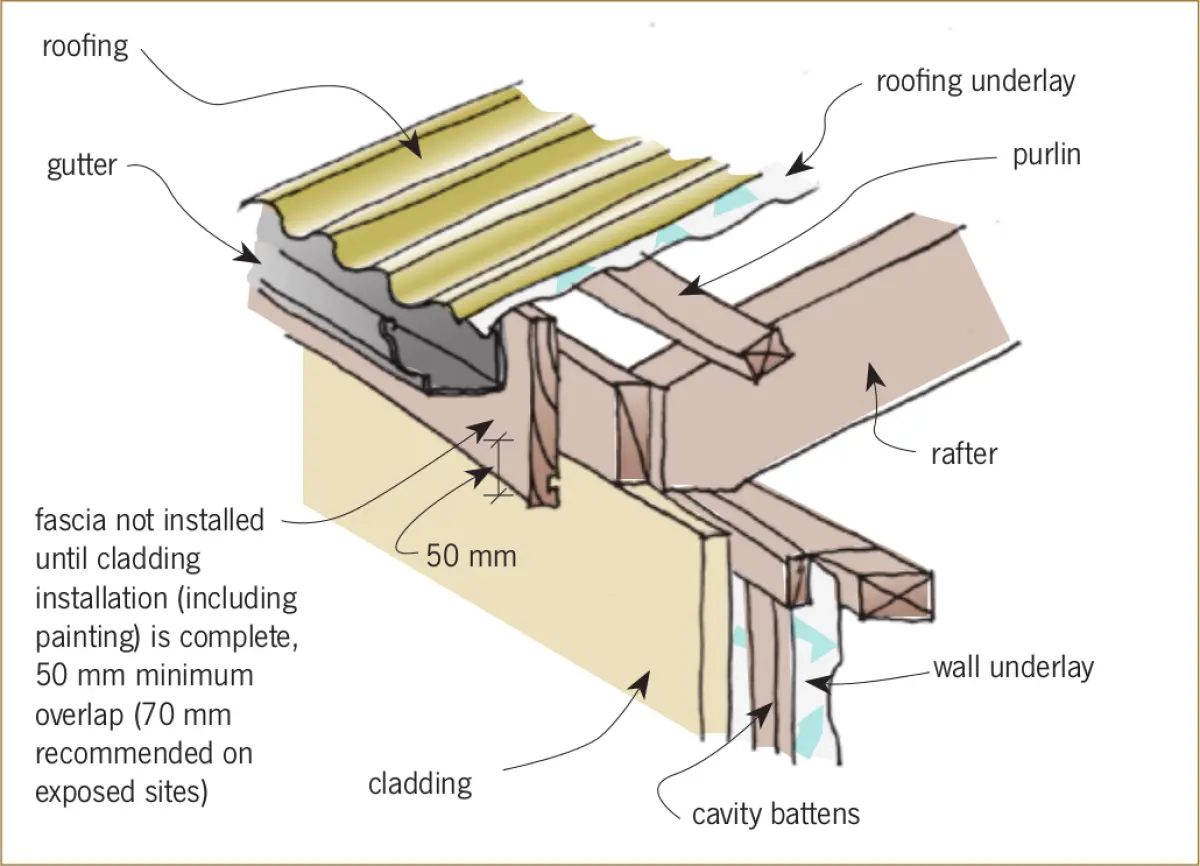


When constructing a junction between a fascia or barge board and a clad wall, designs that follow E2/AS1 (Subsection 5.1.3) require the wall cladding to be completed (including painting) before installing the fascia, barge board or gutter. This is to fully protect the cladding from moisture penetration.
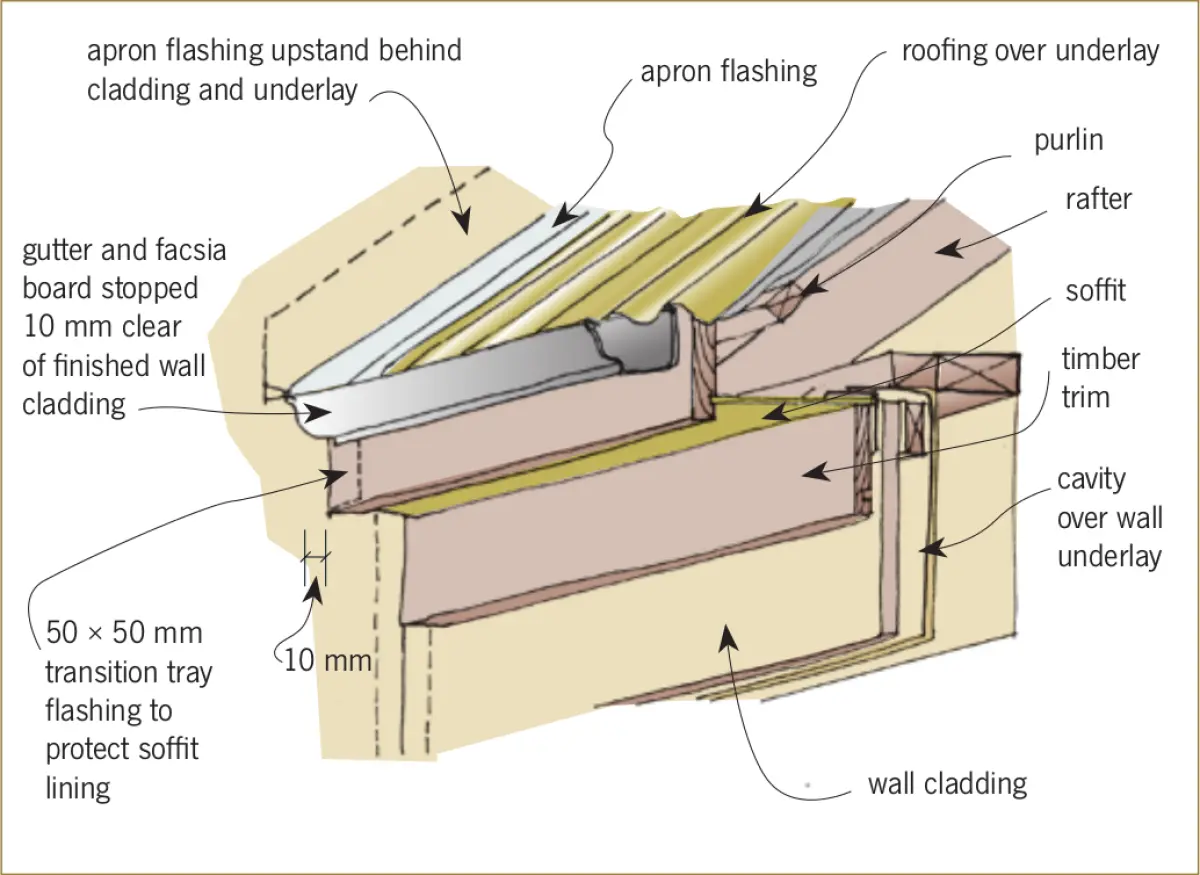
Where gutters, barges and fascias finish against a cladding, a 10 mm gap must be left between the end of the fascia board and gutter and the finished wall cladding (see Figure 1, and Figure 5.1.2.4 of E2/AS1).
Practically, this means installation of the fascia or barge board is done after the wall cladding is completed. A transition flashing to protect the soffit framing is used to bridge the gap at the end of the fascia board.
Some cladding manufacturers have a proprietary solution to this junction.
Fascia/barge board to wall junction (no soffit)
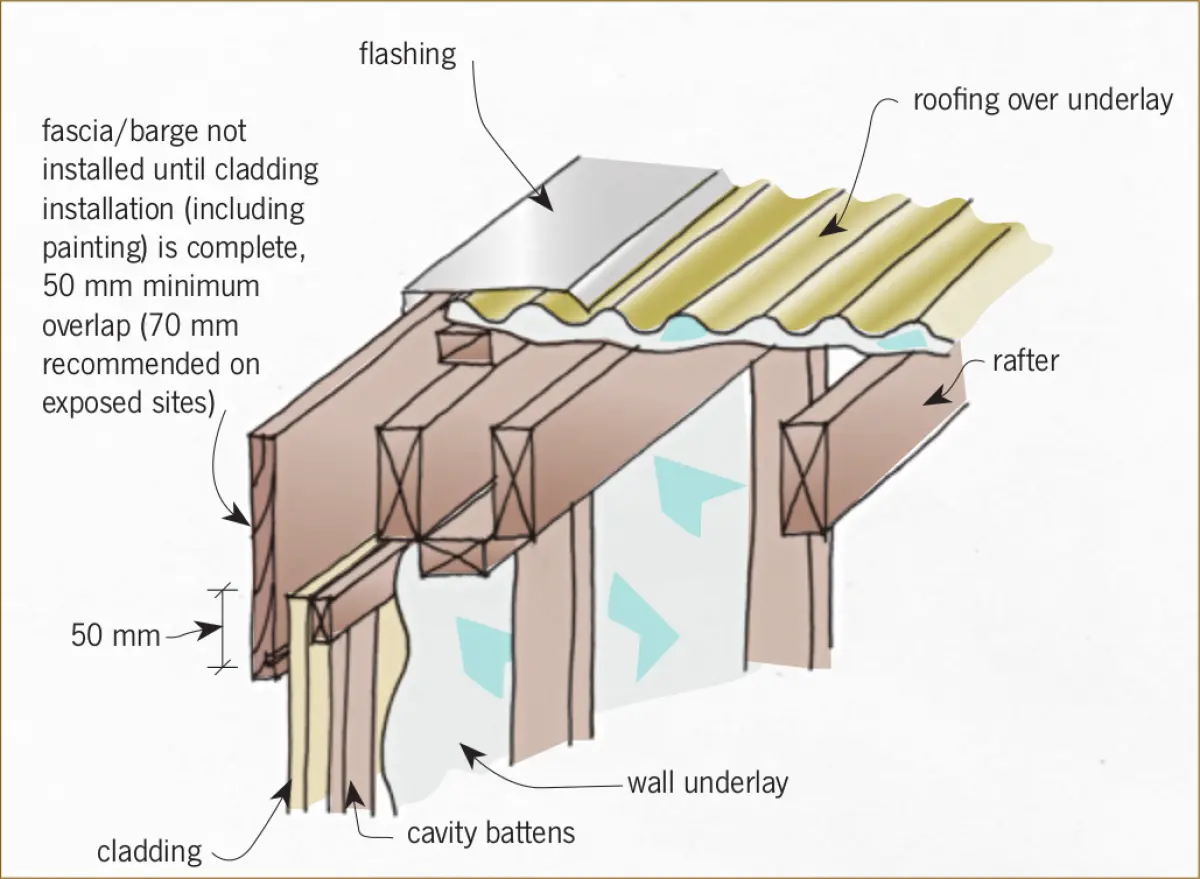
A fascia or barge board that is installed over wall cladding with no soffit overhang, must have the cladding completed (including painting) to allow it to be fully weatherproofed before the fascia/barge board is installed (see Figures 2 and 3).
Allowing a 50 mm minimum overlap of the fascia board over the cladding is recommended; with this increasing to 70 mm in a Very High wind zone (or any wind zone other than EH with low-slope roofing) and 90 mm in an Extra High wind zone (based on Table 4.5.1.1 of E2/AS1 which gives flashing cover minimums).
Installing a cladding that simply butts up to the bottom of the fascia or barge board (as has been commonly done in the past) will allow water ingress at the junction, and is not permitted for designs to E2/AS1 nor recommended as a construction option.