

Where BRANZ Weathertight Solutions eave details are used (such as diagram 1.1.7.4 in BRANZ Weathertight Solutions Volume 1 Horizontal weatherboards), the sequence of construction to create a weathertight detail at the wall and eave intersection should be as shown below for a low slope roof.
The traditional method of constructing this detail has the cladding finished against the underside of the eaves or soffit – water that is held onto the eave or soffit by surface tension can run down behind the cladding.
In the following BRANZ detail, the water will be below the top edge of the cladding and is therefore unlikely to get behind the cladding.
The construction sequence for forming a weathertight junction at the wall and soffit intersection is also the same as that shown below.
Construction sequencing of eave lining (cavity construction)
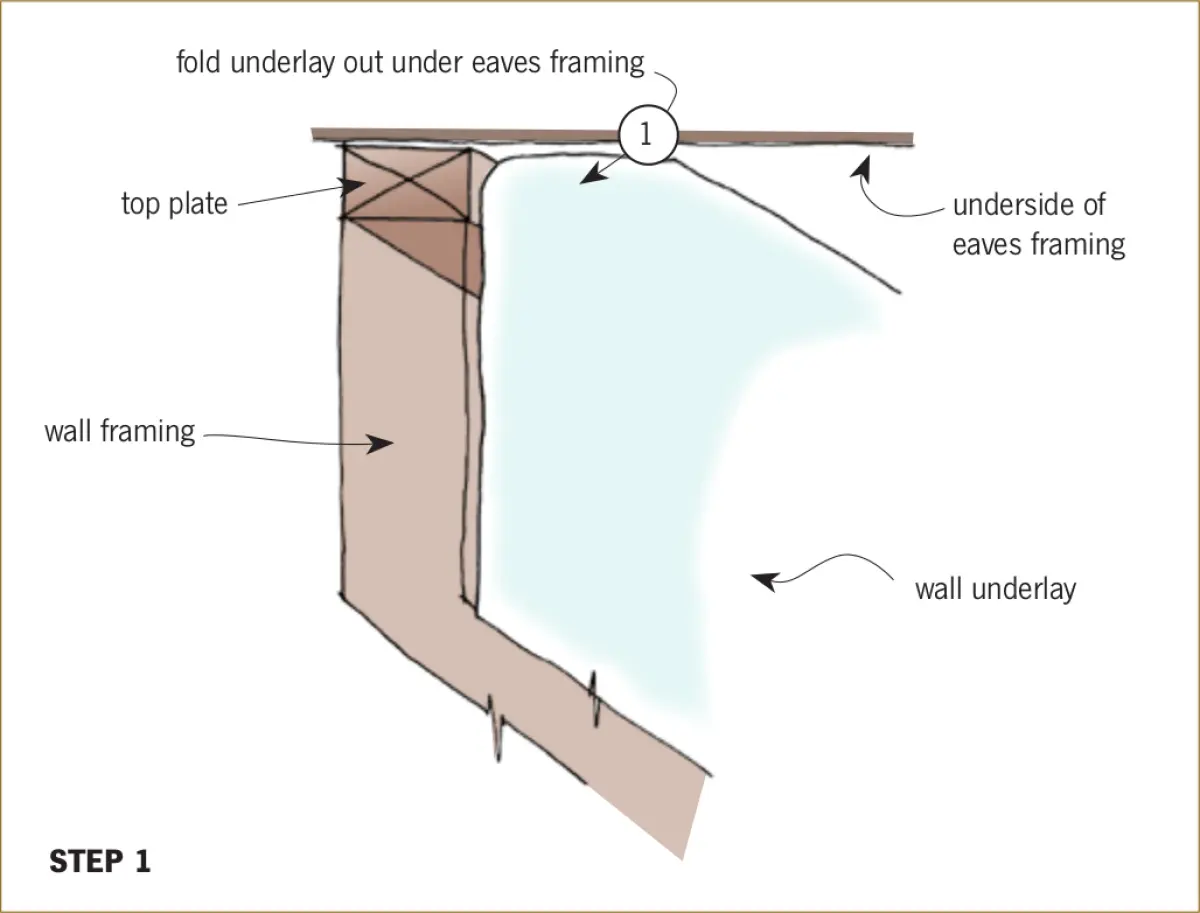
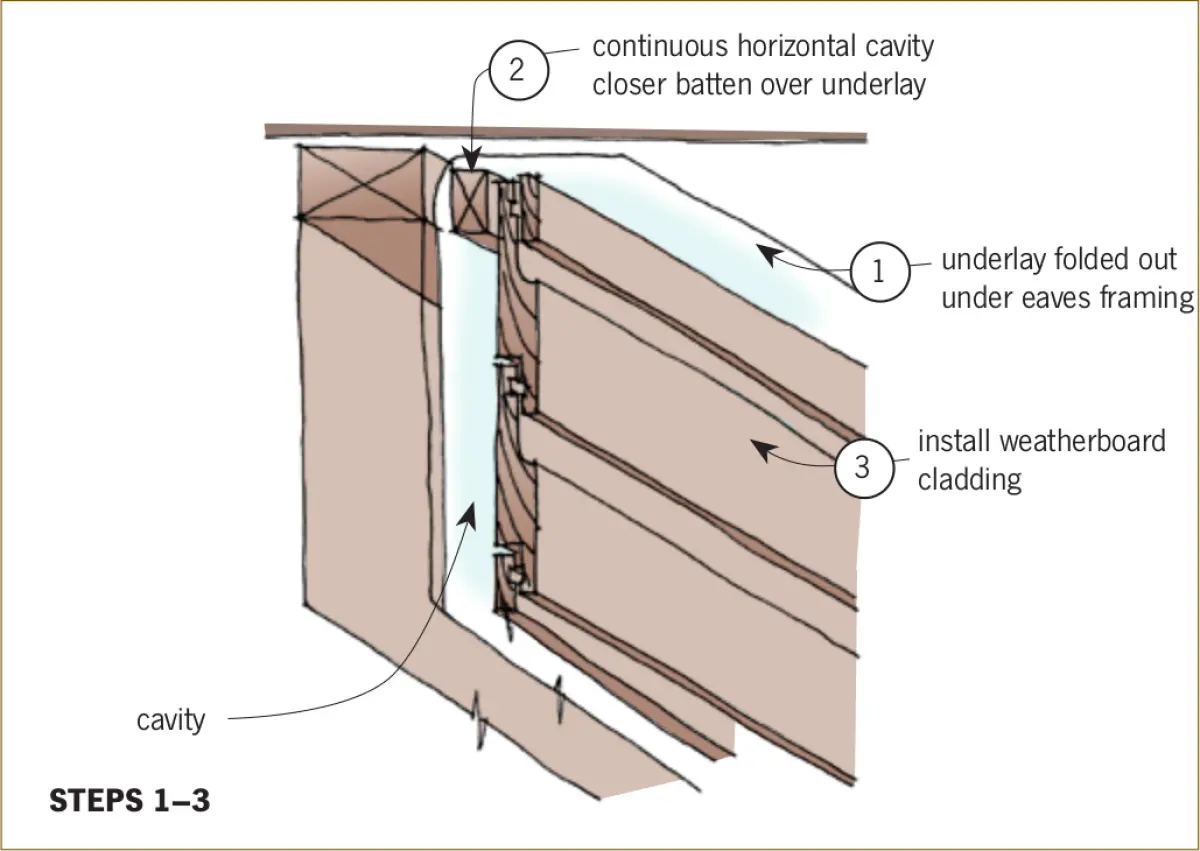
Step 1 – Carry the wall underlay up to the top plate and turn out under the eaves framing.
Step 2 – Close the cavity at the top with a horizontally fixed closer batten. Install vertical cavity battens over the wall underlay.
Step 3 – Install the wall cladding up to the underside of the eaves framing over the battens.
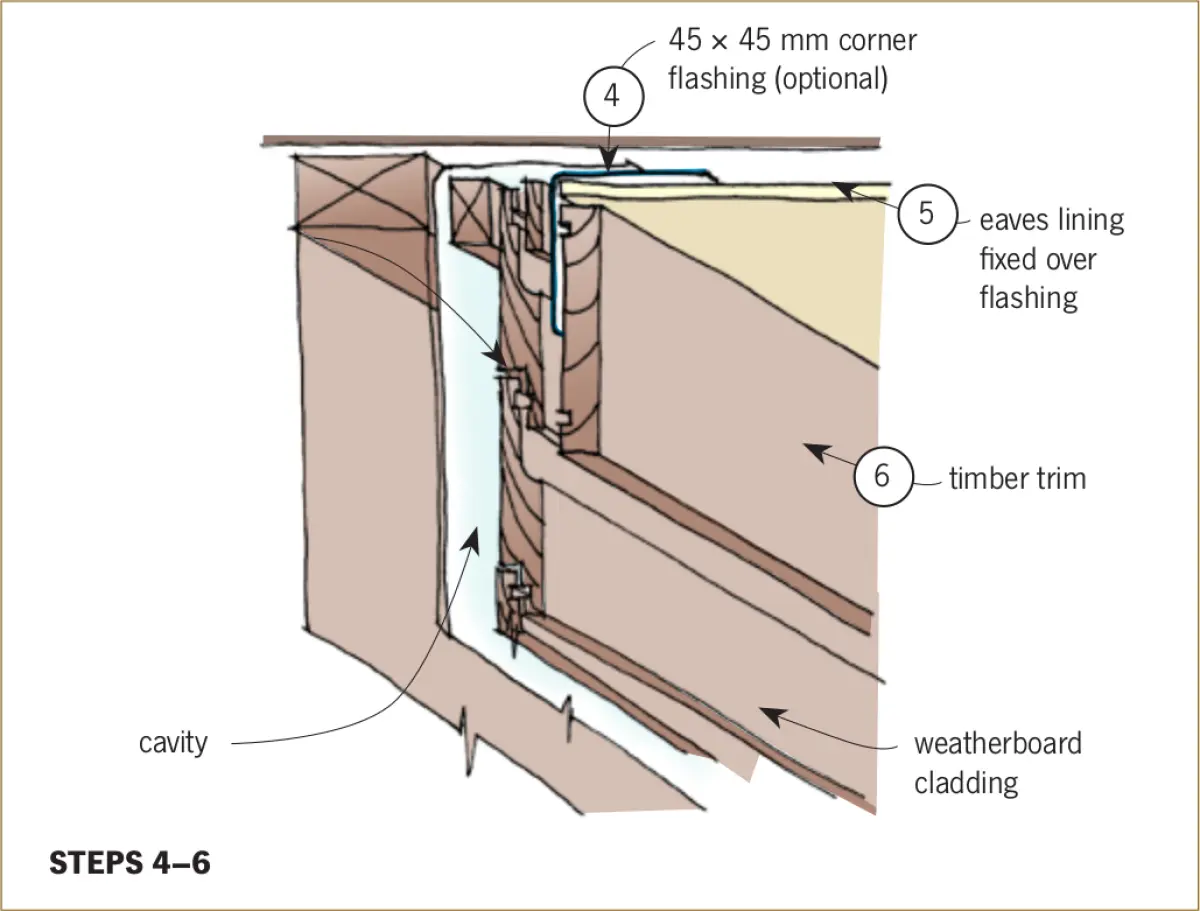
Step 4 – Where flashing is specified to increase robustness, install a corner flashing over the cladding and under the eaves framing.
Step 5 – Install eaves lining over the flashing and finish against the cladding.
Step 6 – Fix a timber trim over the cladding and flashing.